Wednesday, April 28, 2010

Eggs and Creamed Spinach


For an easy-peasy brunch that is beautiful as well as delicious, look no further! I love making creamed spinach because it is dead easy but you can make any adjustments for what is in the fridge. I added tomatoes to this version because there were a couple kicking around that I needed to use and I thought it might calm the dandelion greens. A tip for the dandelion greens, they are quite tough and one of the more bitter greens so I definitely advise blanching them first (particularly if you are using its softer cousin, spinach) and use a 3 to 1 ratio of spinach to dandelion greens. This recipe works well with some serious improvisation, so have at it and have some fun!

Perfect! That yolk is like soft butter inside and the white is firm.

The Recipe

3-4 handfuls baby spinach
one handful blanched dandelion greens
one tomato, diced
2 tablespoons soft cheese (like chevre or my new obsession, quark)
half onion, diced
3 cloves garlic, minced
salt and pepper
white wine, orange juice
one egg per person

1. Heat olive oil in pan and add onion and garlic. Soften and let the flavours mingle and the juices release.

2. Add the spinach, a handful at the time. Alternate with your dandelion greens. You want enough to cover the bottom of the pan, about an inch thick and that is with the cooked spinach. Add the spinach slowly and wait for it to wilt down before adding more, otherwise you'll have spinach everywhere.

3. Mix in the cheese and allow to cream/melt into the mix.

4. Spread the cooked spinach across the bottom of the pan. Sprinkle the diced tomato on top and make shallow "pots" for the eggs. Gently place the egg whole in their little spots.

5. Add a dash of white wine or orange juice (I've even used the juice from pickled beets!) to act like a steam. Sprinkle the whole thing with salt and pepper. Cover and reduce the heat to low to allow the wine to cook off and the eggs to cook. I like the yolk soft and the whites completely cooked.

I have not timed it because I'm terrible at writing recipes for other people and I'm an instinctual cook but I watch for the egg whites to be cooked fully and a light sheen over the top of the egg yolk. This is the equivalent of soft boiled eggs. I'm daring to say it takes around 8 minutes but don't set that in stone!

Creamed spinach is particularly yummy served with quinoa for a light dinner or fruit and toast and brunch. You can even get daring and add hollandaise for decadence. For the adults I usually crack a little pepper on top of the yolk for a little bite.

Sunday, April 25, 2010

Creamy Rose and Mandarin Macarons


A sharp pang arcs through the muscle connecting my shoulder and neck. I have no idea if this will work, if the egg whites will go to waste and the pained muscle in my neck will be for nought. My body feels battered after the first attempt but I must try again. I am loathe to waste the egg whites aging in their compact container on my kitchen counter.

I am an impatient perfectionist. I have already tried this recipe and I barely whipped myself past the first step. Intense need drove me to embark on this potentially failed enterprise. I have yet to see one measly macaron in all of Halifax. Instead, for the last year I have sighed dramatically as I scrolled through countless pictures on the web and devised schemes to befriend and dazzle a Parisian into making or sending me just one package. I dutifully stored my spare egg whites in the freezer and longed for the day when I could make my very own macarons. I agonized over the flavours. Chocolate was enticing but also the most notoriously difficult. I was determined but not stupid (the whole impatient perfectionist thing can really bite me in the ass sometimes).


Why did I wait so long? Why did I torture myself with over a cookie (legendary, but still a cookie) that can be easily found in bakeries and pastry shops in Paris? Besides the obvious location problem I do not own an electric mixer. My reticence was completely unfounded. Thanks to the handy dandy internet I learned a couple of important things about whipping egg whites by hand:
1. Egg whites need air to whip. I tilted the bowl on its side to be able to properly toss the whites.
2. Whipping the egg whites properly literally takes only minutes. My first attempt found me uselessly whisking my eggs to no avail. If you leave the whisk pointed down and fail to incorporate sufficient air you'll get nowhere except heaps of frustration.

If you follow these recommendations it takes minutes.


I often play around with recipes but if David Lebovitz had to make 7 batches to perfect his recipe I wasn't going to mess around. I followed the recipe from seriouseats.com and didn't change a thing. Now that I'm more comfortable with the process I don't mind making adjustments. My strict adherence to the recipe did have one small change: I didn't age the whites as long as Robyn Lee suggests, I let the whites reach room temperature and only let them sit for a couple of hours. Overnight seemed a bit excessive.

The Macarons Recipe

From Robyn Lee at seriouseats.com: posted October 24, 2007.

Ingredients

225 grams icing sugar
125 grams ground almonds
110 grams egg whites (about 4), aged overnight at room temperature
30 grams granulated sugar
Pinch of salt

Procedure

1. On three pieces of parchment, use a pencil to draw 1-inch (2.5 cm) circles about 2 inches apart. Flip each sheet over and place each sheet on a baking sheet. [Note: You only have to draw circles on the parchment paper if you want absolutely even-sized macarons. If you're skilled with piping and don't mind eyeballing the amount of batter per cookie, skip this step.]

2. Push almond flour through a tamis or sieve, and sift icing sugar. Mix the almonds and icing sugar in a bowl and set aside. If the mixture is not dry, spread on a baking sheet, and heat in oven at the lowest setting until dry. (note: I used the blender. I don't have sieve. I apparently have the world's worst equipped kitchen.)

3. In a large clean, dry bowl whip egg whites with salt on medium speed until foamy. Increase the speed to high and gradually add granulated sugar. Continue to whip to stiff peaks—the whites should be firm and shiny.

4. With a flexible spatula, gently fold in icing sugar mixture into egg whites until completely incorporated. The mixture should be shiny and 'flow like magma.' When small peaks dissolve to a flat surface, stop mixing.

4. Fit a piping bag with a 3/8-inch (1 cm) round tip. Pipe the batter onto the baking sheets, in the previously drawn circles. Tap the underside of the baking sheet to remove air bubbles. Let dry at room temperature for 1 or 2 hours to allow skins to form.

5. Bake, in a 160C/325F oven for 10 to 11 minutes. Use a wooden spoon to keep the oven door slightly ajar, and rotate the baking sheet after 5 minutes for even baking.

6. Remove macarons from oven and transfer parchment to a cooling rack. When cool, slide a metal offset spatula or pairing knife underneath the macaron to remove from parchment.

7. Pair macarons of similar size, and pipe about 1/2 tsp of the filling onto one of the macarons. Sandwich macarons, and refrigerate to allow flavors to blend together. Bring back to room temperature before serving.


The Icing: Creamy Mandarin and Rose


one tablespoon of quark*

icing sugar

juice and zest of one mandarin

teaspoon rose water

1. Cream quark and the juice and zest. Add icing sugar and mix until no longer runny but not too stiff. Add the rosewater at the end.

I'm so sorry ... I never measure the icing sugar, I just add until I get to a decent texture. You want to be able to spread it and not have it run off the side. That means it should run off the spoon or crack when you pull the spoon through it.


*Quark is a soft, unaged cheese that is not as creamy as cream cheese nor as dry as chevre. It's kind of in the middle. It has an almost sweet and gentle flavour and it is my new favourite cheese.


For a perfect little saltiness I sprinkled a light dusting of sea salt on the icing before sandwiching the macarons. Yum.


A few things:

1. Macarons are amazing and I love them. They are perfect for the gluten-intolerant folks like myself.

2. They are not that hard to make. You should do it now!

3. If you peer closely you'll see that only about half of my macarons have feet. I don't care because it means I have to keep experimenting until their perfect. Oh well, I can handle that.


Friday, April 23, 2010

Red Wine Salmon w/ Oregano Aioli


Engaging with food is a holistic experience. It transcends consumption and nourishment and I believe we can find a deeper wellness in our life through how we respond and interact with food. mr and I will often joke that I will never be one of the suburban moms on the walking path with a frou-frou dog. There are a myriad of reasons why and that is just fine. What that also means is that our life is on a pretty serious journey and food is at the centre of it all. The food we take into our body has profound effects on our physical and emotional health.

The preparation of this salmon was therapeutic. The stress of the day and all the white noise I had been carrying around squeezed out of the sunny lemon and splashed into our classic white bowls. The flavours of this meal alternate between biting acidity and the soothing and gentle flavours of egg yolk and oregano. The preparation was an equally intense yet rhythmic experience.

I think I have mentioned my fondness for aioli. I particularly love a creamy aioli on top of a strongly flavoured, almost acidic main. The salmon is seared in the hot pan and topped with a syrup of red wine so the aioli simply tones down all the acid and brings the fresh taste of the salmon forward.


It is important to marinate the fish because it infuses flavour and moisture into it; however, you should not marinate past 30 minutes because the acid will break down the fish and it will become mushy upon cooking.

This may sound funny but when you are preparing to make dinner (or any meal), you should really think about the order you plan to follow. I am not a highly organized person because I have a busy 2 year old and and even busier 4 year old, but when it comes to meals I do find it is important. The last thing you want is to realize that the part of your meal that takes the longest you have left until last.

To start, marinate the fish. While it sits in the fridge, happily absorbing flavour, prepare the aioli. I served this meal with left over quinoa and an already prepared cucumber salad which left me time to tidy up and corral the kids into the dining room (that takes longer than one would think).


The Marinade/Cooking the Salmon

juice of 1-2 lemons*
a splash of red wine
a healthy dash of white and black pepper
salt

1. Squeeze the lemon over a strainer set in a bowl. Or, you could do what I do which is fish out the seeds with a fork because you stand in the kitchen tools aisle at the store and stare blankly because you know you want something in particular and don't want to buy the wrong one so you end up leaving empty-handed.

2. Add other ingredients and mix.

3. Lay the fish in a flat bottomed glass dish. Pour the marinade over the salmon and refrigerate for about 30 minutes.

4. Once ready to cook, heat oil in a pan. Place the salmon flesh side down to sear. Cook for about 3-4 minutes. Flip.

5. Pour the marinade over the salmon and finish in the oven at 350 for 20 minutes, or until it flakes easily with a fork. This is where the magic happens with the wine. See the lovely sear on the top of the salmon? That is largely because of the hot pan but it is also the reduced red wine/lemon juice mix. Intoxicating.

*We use one sizeable filet for our family of four. The marinade is mostly lemon juice so the red wine is for colour, but once cooked all that red wine turns into a syrup and this is where it shines.


The Oregano Aioli

a healthy bunch of fresh oregano
dash of coarse sea salt
threetwo egg yolks
olive oil
juice of one mandarin*

1. Grind the leaves of about 4 sprigs of oregano and a pinch of coarse sea salt in a pestle and mortar. My fancy schmancy pestle and mortar are the old mortar (accompanying pestle ran away) and wrong end of a lemon reamer. It should be a really fine paste.

2. I use a separate bowl to mix the aioli because my whisk is too big for my mortar. If you don't have this problem, don't worry about it. Start whisking the egg yolks. With a steady and sure hand, add a touch of olive oil. The trick with aoili is that the more olive oil you add, the thicker it becomes.

3. Slowly add the mandarin juice, alternating with the olive oil. Season with a touch of salt and pepper to taste.

4. Refrigerate while the salmon is cooking. If you leave aioli out in a hot kitchen for even three minutes it can go bad. This is why fresh eggs (obviously!) are best.

5. Spoon over your plated salmon. Enjoy!

An Improvised Lunch: Sweet Pea Hummus


Today's lunch, like most days, is a simple affair. We have an eclectic mix of ingredients which meant a fair amount if improvising. Hummus (or something akin to hummus) is perfect for the mix kicking our in the fridge so we ended up with a sweet pea hummus that was flavourful, a little unexpected and a perfect dip for roasted garlic spaghetti squash fritters. Extra carrot sticks and broccoli florets rounded out a lunch my little people will always eat. When in doubt, give kids dip worthy foods. They'll love you for it.


Sweet Pea Hummus

one can of chickpeas
1/4 cup peas
garlic
one tablespoon dijon mustard
2 tsp. liquid honey
one tablespoon white miso paste (it could be less, honestly I just eyeball my ingredients!)
salt
white pepper

olive oil
apple cider vinegar
soy milk

1. Mix all ingredients together. As always, the spices are listed as to your taste. After you add the liquids (pretty well in equal parts to be able to blend/bind) throw in a dash of sugar to cut the acidity of the apple cider vinegar. Blend until smooth.

I like to make my hummus before cutting up the veggies so that the flavours of the hummus can bloom and mix.

I have to tweak the fritter recipe a little but as soon as it is up to par, I'm sure it will make an appearance!

Thursday, April 22, 2010

An Earth Day Adventure: New Ross Farm


In honour of Earth day we packed a lunch filled with local goodies (egg salad sandwiches with oregano aioli and carrot sticks) and headed out to New Ross Farm, complete with a nature walk. As it turns out, The Boy only really likes sheep. A cow stuck her head in the barn window from the pasture and the little guy nearly scaled mr. trying to get away.


After chatting with the pigs and nuzzling the sheep a little we wandered down the path and onto a path through a wooded area. A number of buds are just starting to peek open in search of a bit of sunlight. The vibrant green is a brilliant splash of colour against the backdrop of winter's darkness. I saw signs directing people to leave the wildflowers for the farm's next guests but the wildflowers have not started to appear yet, soon enough I'm sure.


I don't know if you can see from this distance but those soon to be sprouting rows are being tilled by oxen! Seriously. Huge beasts. After The Boy screamed at a cow I'm sure they last thing he wants to get friendly with is an ox.


Wednesday, April 21, 2010

Lemon Pepper Monkfish


This dish was actually an appetizer but you could certainly embellish and add to it to make it into a full-fledged meal. I found the Monkfish at Pete's for a decent price and since I was already serving lamb I thought I would transform dinner into a multi-course little event to celebrate the safe return of Girly and mr. and to truly make this a full-fledged meal, we had cupcakes from Susie's Cupcakes! Occasionally there will be gluten-free cupcakes in the store, but that only happens if there was a special order. If gluten-free doesn't apply to you, have at it! These are delicious!

Monkfish is a very wet fish which means that it will release a lot of milky liquid as it is cooked. Too prevent this rather annoying habit, salt that fish and let it sit for as long as an hour. I had cut mine into smaller pieces (appie size) so it was only a matter of 20 minutes to get that excess water drained. For the marinade I squeezed the juice of one lemon and added a fair amount of salt and a significant amount of pepper. To neutralize the acid of the lemon, add about a tbsp of sugar, otherwise it'll be inedible. I would say the fish marinated for about 20 minutes. All this salting and marinating took place while I was doing the prep work for other dishes. Fish marinates very quickly so if you buy it on your way home from work, stir up marinade (always include an acid to break down the fish, a sugar to quell the acid) and let it sit while you prep/hug your kids/put on comfy clothes. Fish takes only minutes to cook. That's why it is perfect for spring and summer nights; you can get outside after a delicious meal and spend time with the little monsters you love.*

Lightly dust with a bit of rice flour and sear for 2-3 minutes on each side. Monkfish is notoriously overcooked which turns it into an unpleasant ball of rubber. To infuse more of the lemon pepper goodness into the fish I poured the marinade in the pan and let it boil down before pouring over the fish and rice vermicelli. I had left the noodles plain because the lemon juice is so bold.

*My children are wonderful and I adore them. They really do play a game called Monster.

Tuesday, April 20, 2010

Twisted Mediterranean Roast


I had never cooked (roasted? Seemed redundant.) a roast before but there was one tucked away in the freezer and I was drawn to it. I think it is important to not just experience but prepare a new food, the range of foods that I absolutely love grows constantly. I think I was successful on my first attempt. Little Boy gobbled it up and was eyeing my plate in a most sneaky kind of way. I used a fair amount of liquid and it paid off, the roast was succulent, tender and well-flavoured. Plus, when i was taking it out of the pot to serve, a piece of it fell of and the whole thing fell back in - that's how tender it is.


I was fully prepared to transform the roast into a rather traditional meal for my little family but mr. and Girly had to travel unexpectedly to Toronto so L.B. and I were left to our own devices with this meal. I understood the basics of roast: I like tender, moist roasts. That means I need to cook with liquid. There is such a thing as dry roasting but I am not overly fond of it. Around here, there is no such as cooking with straight water. To keep the pot roast tender I mixed dry white wine with turkey stock to provide a great mellow liquid that would enhance the flavour of the meat but not overpower the delicate balances of spices. A splash of apple cider adds an extra level of acidity that carried the dirty rice I made out of the liquid and was easily quelled by a drizzle of honey minted yogurt.


The smell emanating through our home was simply intoxicating. The spices and gently simmering white wine created this heady mix that kept us warm as an April blizzard was gearing up to dump. In the words of a friend of mine, "There is a reason there are no happy songs about April blizzards". Exactly. April blizzards plunge everyone into a distinctly foul and disoriented mood. People were wandering around in stores, stupefied and unsure of whether or not they should buy bottles of water and terrified to walk out in their capris. That's Nova Scotia. Spring always brings out bizarre fashion, you can see in the span of 2 minutes one person wearing a parka and another in a t shirt and both are entirely comfortable.


The Roast

oregano
basil
mint
hungarian paprika
salt
pepper
dry white wine
turkey stock

1. Preheat oven to 275•.

2. Heat olive oil in the pot you will be using (my pots are oven safe so I'm able to do this, if this doesn't apply to you, use another pan). It should be piping hot.

2. Season roast with salt and pepper, sprinkle with rice flour.

3. Brown the roast. Once browned, remove and roll in the spice mix of oregano, basil, mint, hungarian paprika and S&P.

4. Line the pot with the sliced onions and apple. Nestle the roast into it's bed of future yumminess.

5. Add the liquids, they should rise about halfway up the roast.

6. Roast at 275• for 3.5-4 hours. The internal temperature should reach 160•.

7. Serve with minted honey yogurt.

I cooked mine completely because I am always leery of food borne bacteria and since I am just learning to cook meat I often err on the side of caution.

Minted Honey Yogurt

4 tbsp. yogurt
tsp. liquid honey
mint

Mix together in a bowl, drizzle on meat just prior to serving.

Sunday, April 18, 2010

A Beautiful Market Day

My hubby and little girl are off in Toronto so the Little Boy and I headed off to the Saturday market to meet up with a couple of friends of mine. There was a marvellous crowd flowing through, listening to music, picking up herbs, nibbling on pakora and of course, picking up their weekly provisions.

I am (in true foodie fashion) ecstatic about the greens I bought this week.


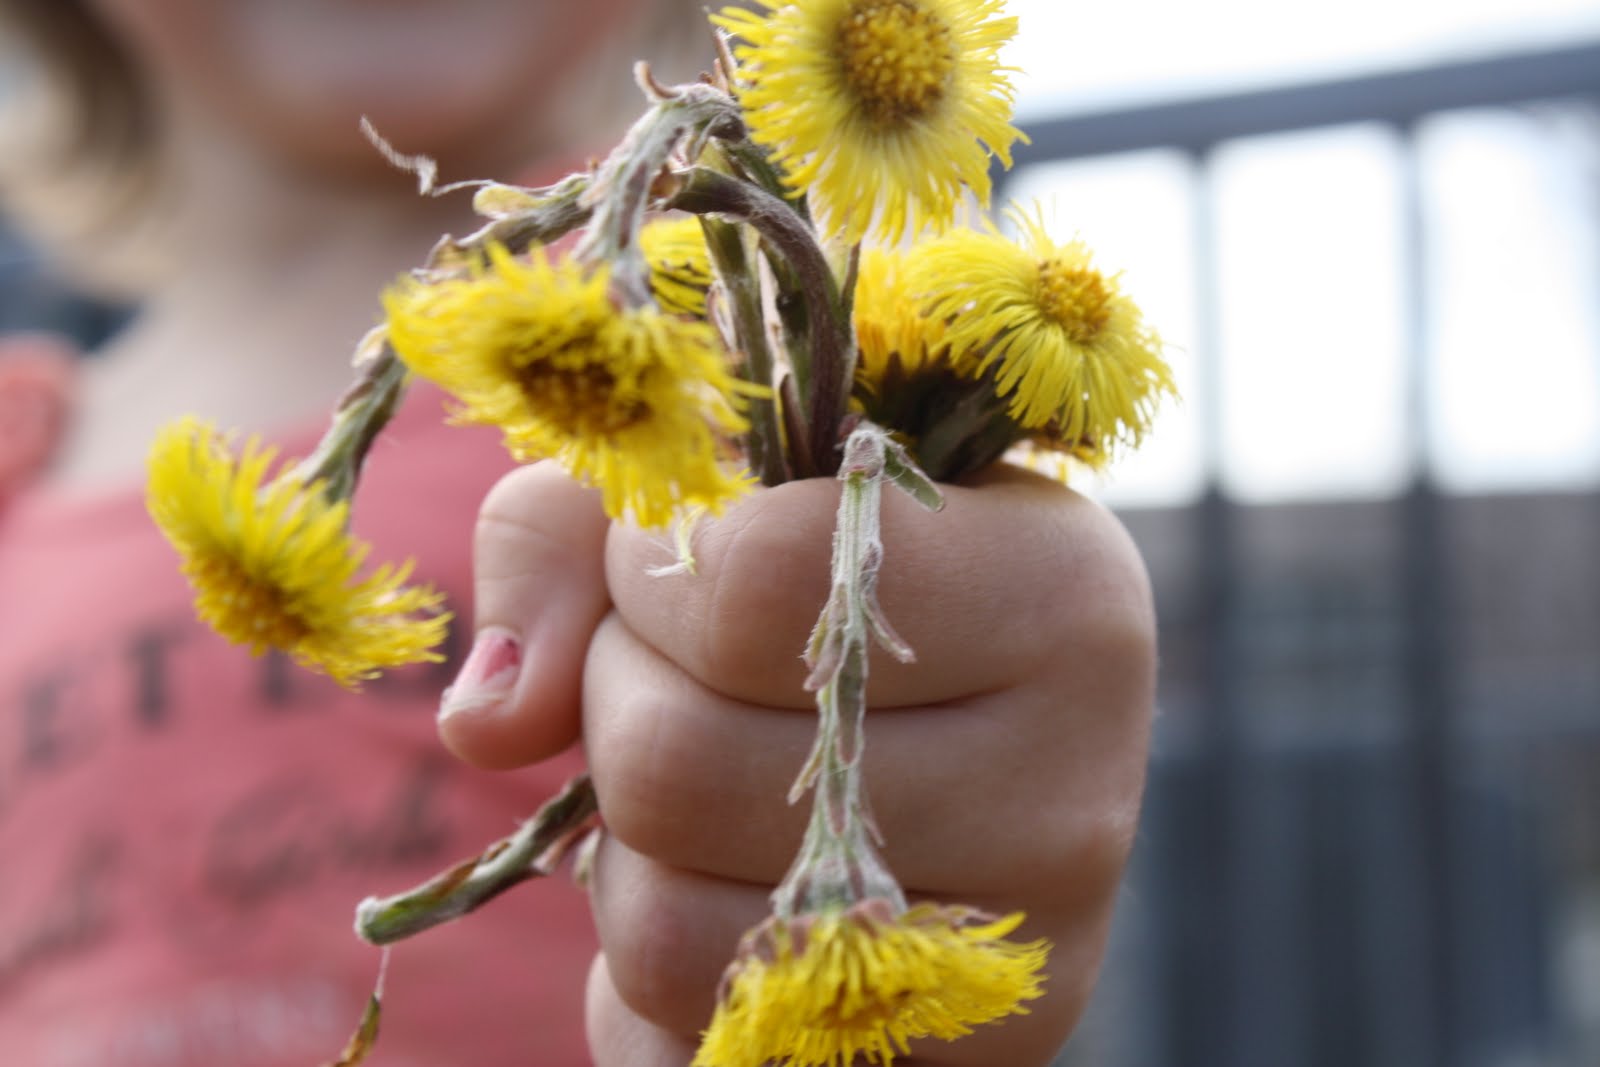
In my excitement over the array of fresh greens I asked what the above plant was. Do you know? I do now .... Take a guess!
These beautiful beet greens with their lace work of succulent purple veins are headed for a lazy brunch tomorrow. One of my favourite dishes to make is creamed spinach*, I love the mix of cheese, eggs and lightly wilted greens. No worries, I plan on making this for breakfast tomorrow so the recipe will be up soon!
How lovely is this baby bok choi? I want to photograph, eat and pet the delicate leaves. The stems are curved together into a perfect harmony of fresh crispness.

*I often use more than just spinach in my creamed spinach recipes. In fact, spinach is a great base to start exploring with your greens. Beet greens pair beautifully with sweet spinach because they are slightly bitter and the spinach will tone down their bitter war cry.

Friday, April 16, 2010

Photo Friday: German Potato Salad


roasted potatoes • carrots • onions • balsamic


Wednesday, April 14, 2010

The Perils of Giving up Processed Food

Tonight is one of those nights when I am mildly cranky and would like to sit down, watch some mindless t.v. that I won't retain and eat a bunch of really salty chips. There is big but here. I swore off of chips about two months ago. Occasionally, Mr. and I would give in to a craving and buy a bag of Honey Dijon Kettle Chips (swoon), but since I emphatically waved my finger one day and proclaimed "I shall not eat chips from this day forward!" (or something like that) there have not been any chips in the house. Or, much of any processed food for that matter. So, when I am feeling cranky and want some greasy-salty crap there is none to be found. These are the perils of giving up processed food. You've been warned. Give up processed food and you'll be healthy.

Saturday, April 10, 2010

The Shameful Antics of KFC

As if using chicken sourced from the most revolting factory farms wasn't enough:


It is entirely shameful and revolting to push this type of artery-clogging, soul-crushing kind of "food". It makes me so angry that when Jamie Oliver is starting The Food Revolution in the US, the Slow Food movement is going strong, and people across the world are reclaiming their bodies and food that KFC would release a thing (can it be called a sandwich if there isn't bread?) like the Double Down.

Reclaim your food. Don't let a huge corporation tell you to eat crap.

Friday, April 9, 2010

Photo Friday


Pork Chops • Ginger Apple Chutney • Roasted Garlic Mashed • Crisp Asparagus

Thursday, April 8, 2010

Thursday Basics: Perfect Gluten-free Bread

I was thinking that I would write about how the smell of this bread baking is simply intoxicating. The gentle scent of fresh baked bread that reminds you of your grandmother's home filters out of the oven and works its way into your memories and blooms all those memories of freshly baked chewy bread that was likely slathered in creamy butter and sweet jam.


The fact that this delicious bread is gluten-free makes it simply divine. It barely lasts in my house. Seriously. The crust is perfectly crumbly and crisp, the inside soft and airy. This recipe came out of poring over recipes and some very serious experimentation. I often find that gluten-free bread is basically compacted flour, meaning it crumbles into a dry little pile of what I thought was bread until I breathed next to it. This bread does not to do that. At. All. It's fabulous. You need to make this!


The Bread

160 g white rice flour
100 g brown rice flour
60 g soy flour
6 g guar gum (about 2 teaspoons)
4 g salt (1 teaspoon, there about)

120 ml warm water
15 ml liquid honey
15 ml quick rise yeast
20 ml olive oil
2 eggs

1. Bloom the yeast in the warm water and the honey. It is important that the water is warm, yeast iskind of like goldilocks: Not too hot, not too cold ... warm is juuuuuust right. If the water is too hot it will kill the yeast, too cold and nothing will happen.

2. Measure and sift the dry ingredients.

3. Mix the dry ingredients into the activated yeast. Add the eggs and olive oil.

4. Pour into a loaf pan. This is not your typical bread dough, there is no kneading involved and it is more like a batter than dough. I generally let it rise for almost an hour in the warm oven. To get the oven warm enough, turn on the oven light when you start getting everything together.


5. Bake at 350 for about 35 minutes. When it is finished the bread should sound hollow when you tap on it.

To store: Wrap in wax paper or wrap in a clean dish cloth. Generally gluten-free bread is frozen because it can turn rancid quite easily because of the flour. I'm sure you could pre-slice and freeze this bread like a commercially prepared loaf, but I don't know from personal experience since it simply won't last.

Wednesday, April 7, 2010

A Spring day to banish malaise


I've been cranky and lacking inspiration today and have spent most of the day obsessively updating twitter and dramatically flopping on the floor and sighing at which point the kids would jump all over me. To perk up out this general malaise I decided that I would share some signs of spring. These were taken two days ago when Mr. and I took Girly and Little Boy to a deliriously close pond for a picnic. Seriously, we have lived in this area for almost a year and we just figured out how to find this pond. Plus, it has ducks and that makes little people ecstatic.

A beautiful bouquet for Mommy.

Girly took this picture! She is over the top adorable walking around with the big Canon in her hands and she is a really instinctive photographer.

Tuesday, April 6, 2010

Cheap Family Meals: Spectacular Hummus


The Food Revolution started by Jamie Oliver is absolutely remarkable. I watched the British version and the child who had not eaten a single homemade meal in her entire young life saddened me beyond belief. It is terrifying to think that there are children in our midst who do not eat well and have no concept of fresh food.

I understand the rhetoric of "eat healthy! organic! whole grains!" is disheartening to a family with a limited income and poor access to fresh food. I know it seems inconceivable that in your town or city people are unable to actually find decent food (and once they do, do they know what to do with it?) but it is absolutely true. In Halifax, near one of the universities there is a large convenience store with "Food Store" emblazoned across its side. As you can imagine, lining the shelves are tins of over-processed pastas in "meat sauce" or sodium-laden soup, boxed crackers and potato chips and just maybe a few green bananas. This store is much like any other "convenience" store but there are a few considerations: It is owned by a large, chain grocer. This gives the impression there will be extra options such as the bananas so this convenience store is in some small way filling the needs of the local community; however, there is not a grocery store nearby that can adequately provide fresh fruits and vegetables instead of the usual unhealthy and expensive food alternatives. What is to happen to the families (and university students - they need good food, too!) that live in this area?

Proper food is not always available in some areas and while it is fine to encourage parents to feed their children with wholesome food it is problematic at a higher level. The healthy lives of our children depends on so many factors, so the next time that you see a child eating from a bag of potato chips and feel like condemning the parent, stop and think for a moment. That parent could really be trying to provide their child with healthy food and hitting any number of roadblocks such as transportation, income, or even something as simple as ignorance of nutrition. When so-called convenience food became the motto of the day, a fair amount of food knowledge flew out the window.

Take a look at this article from Canadian Living about school food programs and why they are vital. This is another article about a school for at-risk boys in Washinton, D.C. (thanks to Marisa from Food in Jars for tweeting this a bit ago!).


All of this being said, it is possible to have inexpensive and very healthy meals for a family. The other day at lunch we had creamed dandelion greens (I like it but everyone else found the dandelion greens a bit bitter - use spinach for a gentle flavour) with a poached egg and hummus with a bunch of dip-able veggies and baked tortillas. A fantastic, healthy and super cheap meal for the family.

The Hummus*


one can of chickpeas (garbanzo), drained
2 cloves garlic
1 tbsp. white miso paste
60 ml soy milk
30 ml lemon juice
15 ml olive oil
1 tsp. Provençale mustard
salt, to taste
1. Put everything in a blender. Don't forget to peel and smash your garlic with the side of your chef's knife to release the oils. Mix until smooth.

2. Once in the serving bowl, drizzle with a bit of olive oil and a dash of Hungarian paprika. Start dipping.

* I am well aware this is not the usual recipe for hummus. It is nearing that time when we need to go grocery shopping. The basic ingredients for hummus are:

one can chickpeas, drained
3-4 cloves garlic
lemon juice
olive oil
salt

I use soy milk instead of olive oil because of the fat content and olive oil, while delicious it is fairly expensive. The mustard adds a beautiful sweet tanginess and that miso paste is instead of the usual smooth tahini. Be careful about the salt if you use miso as it tends to be fairly salty. The point of the tahini (or miso, I've even used peanut butter) is that it makes the hummus smoother and creamier.