Friday, December 31, 2010

The Last Post of 2010

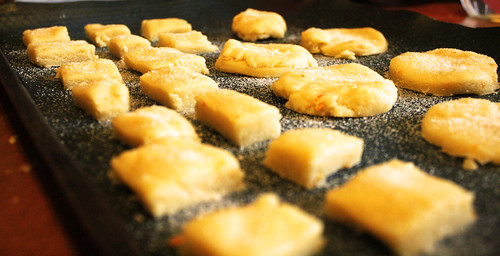
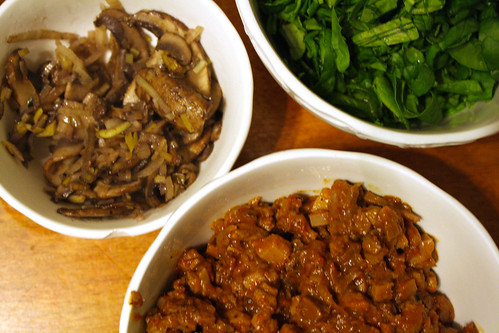
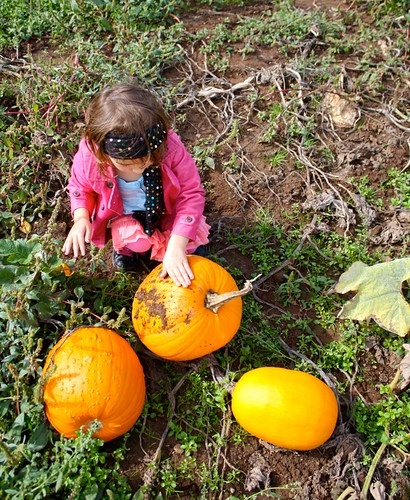
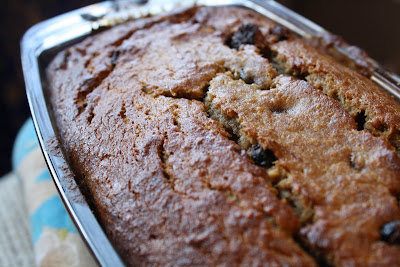
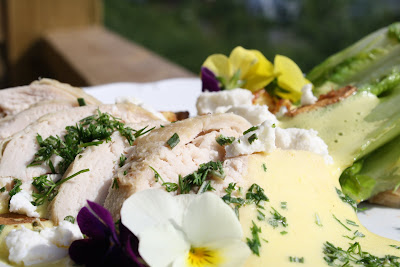
This year has been an extraordinarily long one, filled with some ups and a lot of downs. It is easy to focus on those downs when it feels like we are faced with so many so while I am happy to let go of this year and all of its difficulties I am most definitely looking forward to what 2011 can possibly be. I haven't properly prepared to write this post and I feel a touch fragile about it, mostly because an ending makes me feel prickly and touchy, disoriented in my own skin and so with that, some of my favourite food photos from 2010:


In the new year I will broach the subject of gluten, it disappeared from my life for a while and after things fell apart (remember how 2010 wasn't that great?) it came back with full force. And that's okay.

Sunday, December 19, 2010

A Homemade Project for 2011
IMG_8535

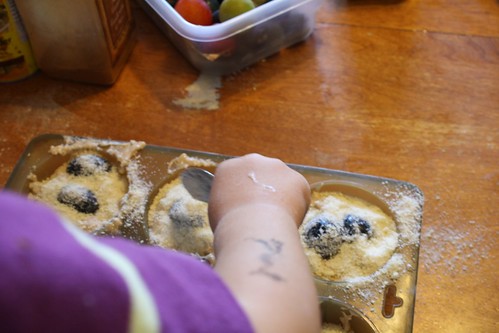
This Christmas my presents have come from local stores, book fairs or I have made them and while this has been necessary because we do not have a lot of money, it was also a lot of fun. When you make a gift for someone you can take the time to really think on what they like then create your vision. The mall won't offer you that.

I began to wonder, what if every month I made something, whether it was a few jars of jam, a casserole or even a favourite plate of cookies and gave it to someone in my life. Spontaneously pass on just a piece of kindness to anyone at all, even the couple next door who are tremendously quiet against my raucous family. Perhaps, especially that couple. As a whole, society is very concerned with giving at this time of year, definitely to family and maybe to a charity; come January life settles back into normal and that giving seems to end. I'm not asking for altruism here but there have been a number of "pay it forward" hashtags on Twitter recently but most are consumer based: "I bought Starbucks for the person in line behind me!" was common. That's kind but what if you made a jar of hot chocolate with homemade peppermint marshmallows and gave it to the shivering postal worker on your doorstep one morning?

IMG_9345

What I am proposing is that each month I (or another terrific blogger) will choose a theme and make something for someone in my (and your) life then blog about the experience of being the nut who gives loved or peripheral people in her life food gifts. I'm thinking that I will announce (that makes me sound so official) the theme at the beginning of the month and then about two weeks later blog the recipe and what happened. Feel free to join me in doing this random act of foodie kindness and I will link to your post on a designated date. I think this could work.

Saturday, December 18, 2010

Spinach and Egg Crisps

Stealing a nibble

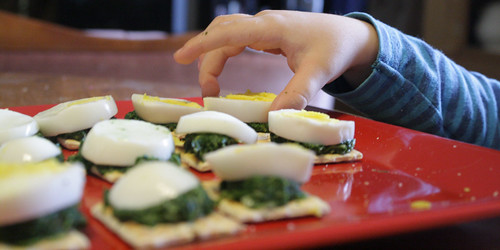
The other day I was seriously craving hummus but the only chickpeas in the pantry were dried and seeing how it was already lunchtime, I couldn't really make Bubs wait 2 hours for chickpeas to hydrate. Instead, I start washing, chopping and throwing things into a pan without one clue as to what I was doing. The tastiest meals can come out spontaneity. This plate of crisps was perfect for Bubs and me as a light lunch, add in a glass of milk and a piece of fruit for lunch and it's a surprisingly healthy lunch. It is also a potential party food, spiced up a bit with slivers of smoked salmon and a bright drizzle of olive oil.

spinach smear

The recipe

bag on spinach, washed
half onion, diced
3 tbsp. apple cider
salt
2-3 tbsp. soy milk
S&P to taste

2 eggs

15 stoned wheat crackers (mine had caraway seeds and I strongly urge you to do the same)


1. Bring water to boil. Gently lay (with a spoon) two eggs in the water. Set the timer for 10 minutes.

2. In a pan heat a tablespoon of olive oil until it slips easily across the pan. Add the onion and cook until translucent.

3. Add the spinach and the apple cider, cover. It should take just a few minutes for the spinach to wilt, even though you will be blending it and breaking it down you do not want the spinach cooked to mush as it will destroy the flavour.

4. The eggs should be finished at this point. Dump out the water and run under cold water. Leave to sit in the water, you could even add a few ice cubes to speed up the process. Once cool, peel and slice.

5. In a blender add the cooked spinach and the soy milk. Pulse - I didn't make mine into a smooth purée because I wanted the texture. Taste and add salt and pepper if needed.

6. With a spoon, drop a spoonful of the spinach mix onto a cracker and flatten with the back of the spoon. Top with a slice of egg. Salt and pepper if you think it needs it.

Enjoy.

Thursday, December 16, 2010

Orange Shortbread Cookies
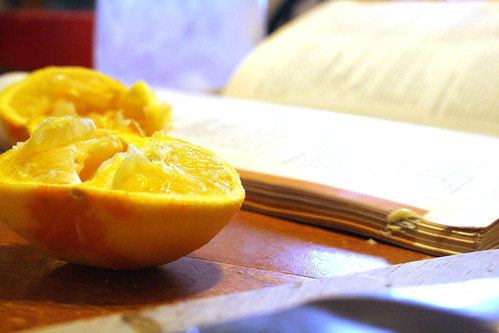

squeezed oranges

A month and a bit ago I inherited a lot of cookbooks from my father. I knew that he liked to cook and I think everyone who knew him knew that he loved food but I didn't realize that he had amassed a pile of cookbooks. Flipping through the Laura Secord Canadian Cookbook I found my dad's name and the date in his precise cursive on the title page, 1973, I think this particular cookbook is my favourite. Through his travels, his storytelling and his search for the new, Dad kept testaments to his past hidden on the bookshelf. What we know of ourselves and how we reveal it is in the titles on our bookshelves and standing in my father's quiet bedroom, this nearly 40 year old volume of recipes in my hands, these thoughts swirled in my mind. The cookbook, with its wide array of traditional recipes that border on the quintessentially wacky (Pink Snow Bars - which I want to make purely out of a sense of homage) are my father. The other cookbooks are too, but he held on to this one for 37 years, through all the changes, the moves within the city and out of the country, when he was no longer a teacher and once again a student, all of it; this little cookbook sat on the shelf.

Shortbread Cookie Army

The recipe I used was actually called "Lemon Biscuits" and was a lovely basic recipe for lemon shortbread but since I had neither lemons or a love for following a recipe I made mine with orange. I know I have orange extract somewhere but whenever it is needed it always disappears so I had to rely on orange juice and if you plan on making these, I'd ensure you have orange extract. The zest and juice do add a lovely flavour but it's not enough to explode orange, it's more of a persistent and gentle murmur. I had originally intended these cookies for Christmas but I have been promising Miss N the chance to decorate some cookies and we have all the icings and sprinkles but not the time. It took her about three seconds of turning her big (and gorgeous) brown eyes on her Daddy and they broke into the tin of cookies. It was completely worth it. Not only that, but the bold splashes of colour across cookies was an even more perfect homage to my father.

Enjoy.

Decorated shortbread

The Recipe

Adapted from "Lemon Biscuits", Laura Secord Canadian Cookbook.

Preheat oven to 375º.

3 1/4 cups all-purpose flour
1/2 tsp. baking soda
pinch of salt

3/4 cup butter or shortening, room temperature
1 1/4 cups granulated sugar
zest and juice of one orange, medium sized
2 eggs, room temperature

1. Sift together the dry ingredients.

2. In a separate bowl cream the butter or shortening. Slowly add the sugar and mix until fluffy. At this point add the zest and juice of the orange.

3. Add the eggs and mix well.

4. Ad the flour and blend together until it is a stiff dough.

5. Roll out on a lightly floured surface and cut into squares or use cookie cutters. This is the time to break out the Christmas tree cutters!

6. Bake 10-12 minutes or until golden brown. The directions call to lightly grease the cookie sheet, I lined mine with silicone baking sheets which keeps the bottoms significantly lighter than parchment paper.

If you are so inclined you can ice these babies with some fantastic icings. I'm looking forward to working with some royal icing; this time I used packaged icing scribbles which were great for small details but still had a bit of a weird flavour from the colouring.

Monday, December 13, 2010

Clementine Cranberry Cookies


cranberry clementine cookie

It's that time of year when we are surrounded by sweets, people and if you are anything like me, you have flour handprints on your bum. A few weeks ago I attended a cookie exchange and Tammi was gracious to invite all of us social media types into her home. I was terribly nervous, anxious even to waltz into a stranger's home, laden with cookies and just myself. I am extraordinarily introverted and while I wanted to just stay home and not put my baking on the line and expose myself to people (gasp!) but when there's 80 cookies lined up on the dining room table, you don't mess around and you pack them up and go. An aside, Tammi and the ladies at the cookie exchange were all very sweet and I wouldn't be surprised if there were a few who felt the same as me, after all, we're social media types, right?

When faced with an impending cookie exchange, a good bet is a slightly sweet, tangy cookie with a rich white chocolate drizzle. I had tossed around a number of ideas, lemon poppyseed, orange poppyseed; basically anything with poppyseed because they were stuck in my mind. In typical "me" fashion I bought the bag of poppyseeds and the pack is still in the pantry waiting for their intended project, whenever I figure out what that may be. The dough for my cookies was just a basic chocolate chip cookie dough because it can carry the variety of flavours I wanted to add without taking over, not only that but it's great because you can play with the texture based on whether or not you use butter or shortening.

cranberry clementine cookie

The Recipe

Adapted from the chocolate chip cookie recipe from Joy of Baking.

1 1/2 cups butter
3/4 cup granulated sugar
3/4 cup brown sugar
2 eggs
zest and juice of 4 clementines

2 1/4 cup flour
1 tsp baking soda
1/2 tsp salt
1 tsp cinnamon (optional)

1 1/2 cup dried cranberries
1/4 cup dry white wine

1. In a medium bowl cover the cranberries with the wine. Allow these to soak while you collect the ingredients and preheat the oven to 350º. Allow to sit for a minimum of 30 minutes.

2. In a separate bowl cream butter or shortening and add the sugars. Beat until fluffy (at that really tempting point when you kind of want to stick your finger in and try but remember it's straight butter and fat). Add the eggs at this point and the zest of the clementines. The specks of orange are beautiful but not entirely enough for flavour, hence adding the juice at this point.

3. In a separate bowl sift the dry ingredients.

4. Combine the dry ingredients to the creamed mixture of butter and sugars. When it is fully mixed, add the cranberries and mix until cranberries are evenly distributed. I found the mix a bit dry so I ended up using the wine too.

5. Drop onto a lined baking sheet and bake for 12-15 minutes, until a light golden colour and crisp edges.

The Glaze

4 squares white chocolate
1 1/2 - 2 cups icing sugar*
cream

1. In a double-boiler melt the chocolate. Take extra care, white chocolate is quick to seize. Carefully add a dribble of cream.

2. Remove the double boiler from heat (but keep the bowl on the pot) and add the icing sugar 1/4 cup at a time. Mix quickly so there are no lumps to desired consistency. Mine dripped off the tines of a fork but was not overly liquidy, it kept its shape on the cookies.

3. Drizzle over the fully cooled cookies. Cool for about 2 hours.

*I think it was this much sugar, I was adding it slowly and lost count at one point.

Sunday, December 5, 2010

Beef Tongue Tacos
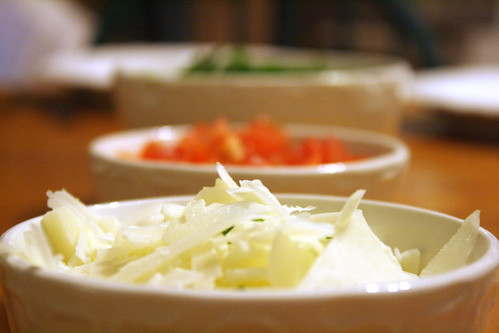

Taco Toppings

It's a funny thing about beef tongue - it really looks like tongue, complete with taste buds. It is also very large, again not terribly surprising but still a lot to wrap your head around. As Mr. said, "You know that a year ago we were vegetarians and now you have a beef tongue in the sink." Of course I used the innocent brown eyes tinged with a bit of indignation, of course I have a beef tongue in the sink! Of course I'm going to eat it! Of course it freaks me out because it kind of feels like pinching my own tongue in a very over-sized sort of way but I was determined to do it. As much as my hubby loves me and no matter how adventurous he may be, Mr. made himself a vegetarian taco that night.

This hasn't been the greatest lead up to dinner. What you may not know is that beef tongue is incredibly tender with a very subtle beef flavour that easily soaks up flavour. For the quantity of meat you can get out of the tongue it is very economical. I know a lot of people use the meat in sandwiches and I can see why, the tender slices are a nitrate-free, natural alternative to lunch meat. To be honest, the reason I made tacos was to disguise some of the more "tongue-like" features and I would highly suggest it. There is a reason why mothers never tell their kids what it is until after it has been eaten, it's tasty but can give you a bit of a shaky knee reaction.

Mushroom, Tomato Tongue, Spinach
I am still torn about the experience. I enjoyed preparing and eating this dish. It was undeniably delicious and to think that such a large portion of meat was not carelessly thrown away is reassuring when so many people are quick to throw away, particularly in light of the offal movement. I gave up being a vegetarian because of something a friend said to Mr. and I: "You're proud of your vegetarian for ethical reasons but is it environmentally friendly? You got your protein from imported almonds or whatever but it's not from here. My meat from down the hall from a fellow farmer. I traded him vegetables for it." We were standing in the farmer's market when we ran into Ted, the lanky farmer from whom we bought our vegetables and he made a valid point. We meekly stated that our tofu was local but was it enough? As much as we enjoyed our vegetarianism in some respects we had an uneasy relationship with it. So much was imported, shipped in from dots on the map. We slowly started incorporating meat from local producers, people we knew and had worked alongside at the market. We knew the farmers, their ethics and views on how to properly raise animals without the use of antibiotics, growth hormones and anything funky. I do not fault anyone for being a vegetarian, how could I? I do believe that we need to think about where our food comes from and what we do with it, eat natural foods in their whole state (despite my ravenous sweet tooth) and just start thinking about our impact on the world.

A note: We have a policy of full-disclosure with our children (kidded down of course), so after pretending to lick Miss N's face with the cooked beef tongue and explaining what it was, the kids still ate it. In fact, Bubs had seconds.

The Recipe

one beef tongue
one onion, diced
250 mL red wine
2 overly ripe tomatoes, roughly chopped
2-3 cloves garlic, finely minced
cumin
salt and pepper to taste

1. Boil the beef tongue in water for about 3 hours.*

2. Once you are able to handle it, you will have to peel the skin off of it. I made an incision down the centre of tongue then using a paring knife peel it kind of like a apple. The skin will peel off fairly easily but it does take some encouraging. Reserve.

3. Heat olive oil on medium heat until it slips easily across the bottom of a high-sided frying pan. Add the onion, cook until translucent.

4. Dice the tongue and add to the pan. Lightly sear and add the wine. Keep the temperature high for just a few minutes to burn off the alcohol.

5. Add the tomatoes, garlic, cover and allow to reduce on low heat.

6. Add the cumin, salt and pepper. All of this is to taste.

7. Serve with ribbons of spinach (instead of iceberg lettuce!), diced tomatoes, grated cheese and any other favourite taco toppings. Enjoy!


Wednesday, December 1, 2010

Wordless Wednesday: Gertrude's Plates

A treasured find in Dad's apartment: His mother's beloved blue plates.


Gertrude's Plates

Tuesday, November 30, 2010

Carrot Soup
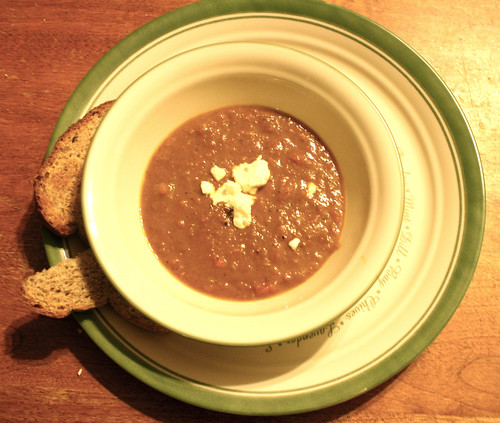

Carrot Soup

This past month has been a very long month, both physically and emotionally draining and in the midst of it all I could not even think of blogging. We did, however, eat and this warm and creamy carrot soup was one of the many dishes of comfort my family ate to feel a little more centred. There is a hint of spice, an underlying sweetness and the heartiness of carrots buoyed by red wine. Crumbles of chevre on top melt into the creaminess of the soup and add a great punch of tang against the subtle backdrop of the soup. This soup will warm you.

The Soup

1 onion, diced
5 medium sized carrots, peeled and diced
250 ml dry red wine
2 healthy spoonfuls of plain yogurt (goat is best for tang!)
500 ml water
S & P to taste*
chevre
olive oil

*I ran out of stock so had to use straight water - to compensate I had to add a lot more salt than usual. If using stock, obviously you won't need to freak out your family with the amount of salt you're adding.

1. In a medium sized pot heat bout a tablespoon of olive oil until it slips easily across the bottom. Add the onion and lower heat to medium low. Cook until translucent and the liquid releases then cook a little longer.

2. Add the carrots. Allow a little browning on the edges of the carrots- that's flavour! I cut mine into medallions which was kind of a pain when it came time to blend it. I highly suggest dicing the carrots.

3. Raise the temperature to medium-high and add the wine to deglaze the bottom of the pan. Leave the wine and carrots to mingle a bit before adding the water. Cover and boil until the carrots are fork tender.

4. Remove from heat. I used an immersion blender to purée the whole thing. Feel free to use a stand blender but be very careful.

5. Once smooth, swirl in the yogurt. Don't forget to add the salt and pepper! Taste test!

6. Serve with toasted wedges and crumbles of chevre. Enjoy.

Wednesday, October 20, 2010

Wordless Wednesday: The Great Pumpkin Search

In a pumpkin patch, one must always dress well and consider the options.
IMG_8474

Tuesday, October 19, 2010

Broccoli and Toasted Lentils


Broccoli and Toasted Lentils

I am always struck by the self-discipline it takes for people to develop or even join a movement of weekly posts and actually stick to it. I am so frazzled with our lives to the point that I always think, why the hell am I stressed out and then I start listing the reasons in my head just so that I will feel justified in having a cup of tea and watching copious amounts of crime drama instead of cleaning the kitchen. Imagine my delight when last night I discovered this tweet by Emily about a new post at her blog well fed, flat broke and I thought: I like broccoli. I like tofu. Holy crap, I also like peanuts! And tonight's dinner was nurtured in my head at 2:00 in the morning.

Turns out, we didn't have tofu or peanuts, or any of the spices Emily used; instead, I just opted to run with whatever we had in the fridge and pantry and this dish was born. This is inspiration, you see an image, a smell comes to you as you walk through your neighbourhood or you realize your favourite vegetable is in season a few weeks earlier than expected. Last week we received a full head of broccoli in our CSA from the Hutten Farm and it was a lush, deep green that begged for a great dish for it to flourish. The toasted almonds combined with the toasted lentils add warmth to the dish, completely contrasted by the subtle lemon from the cooking process. Served on a bed of brown rice, this is a full meal in only two dishes and within 30 minutes. I am guessing at the time because I was making stout brownies at the same time and for about 15 minutes everything got a little jumbled before the brownies made their way into the oven.

It may seem like there are a lot of steps associated with the broccoli and toasted lentils but it's mostly because you will be adding different things in stages to preserve their texture and flavour. There is nothing worse than overcooked vegetables and a sure way to achieve mush is to add everything at once.

Broccoli and Lentils, close

The Rice

brown rice
water
pinch of salt

Note: Don't freak out. There is a reason for my lack of measurements.

1. Layer rice in the bottom of your pot - remember, brown rice seriously fluffs up. I generally cover the bottom with an inch of rice.

2. Add water, cover the rice, shake the pot to settle the rice and add another inch of water above the rice.

3. Cover and bring to a boil then turn it down to low. Cook until the water disappears and there are holes down through the bed of rice. It should take about 35-40 minutes.

Broccoli and Lentils

handful of slivered almonds
one onion, diced
one apple, chopped
1/4 cup blue lentils - these hold their shape
the florets of one head of broccoli
cupped handful of chopped yellow beans
2-3 tablespoons lemon juice
red curry paste*
S&P to taste

1. In a heated pan, gently toast your almonds. This should take about 3-5 minutes and the almonds should turn to a golden brown, almost the same colour as light brown sugar. Set aside.

2. Toast your lentils and if you are like me, forget about them for a solid 7-8 minutes then hurriedly toss in 3 tbsp of lemon juice and enough water to lightly cover them. They should not be submerged. Cook for 15 minutes. Reserve.

3. Heat olive oil. Add the diced onion and cook on medium-low until the onion is translucent. Add the apples and about 3 teaspoons of lemon juice to break down the apples. Cover.

4. Add the broccoli and yellow beans. Lightly saute until the colour in both vegetables becomes vibrant. Add the lentils.

5. At this point, add the red curry. Use your judgment. I used the opposite end of my wooden spoon to take out just a hint and then mixed it in, I did this about 5 times. Children were eating the dish so it couldn't be spicy but know that red curry offers more warmth than a punch you in the mouth heat.

6. Add those beautifully toasted almonds and season to taste.

Sunday, October 17, 2010

Kale, Pork and Spaetzle, oh my!


What does it mean to eat healthy? We think it's important to offer our children and our selves healthy options, to fill our plates with whole grains, fresh vegetables and carefully selected portions of lean meat. You may visit the farmer's market or your local grocer and fill your cloth bag with a bounty of delicious fruits and vegetables. Your children can sniff those vegetables, smile shyly at the farmer and help you cook of all that into wondrous meals that you all eat and enjoy. Or so you think. It does not matter how healthy you strive to be or portend to be if there are little people (or even you) in your house who push the vegetables away to get to the noodles. It seems like a simple equation, doesn't it? Sometimes it isn't. Sometimes you will be told by a very apologetic doctor that your son, the one with pneumonia who has been sick for two weeks and barely eating that his iron is low and he will need a supplement. The doctor will be kind and gentle as he asks you questions about your sick child's diet and though he is satisfied that the problem is that the little guy's iron is low precisely because he's beens so sick; there will be nagging doubts that you didn't and have not been feeding your child properly. It just may send you into a tailspin of doubt about all that food you prepare. All those hours in farmer's markets and in the kitchen will seem as if for nothing.

As a family we went home and regrouped, which means to return to the kitchen, our dining room table and the market. Bubs and Miss N went back to running around the farmer's market on Saturday morning and sneaking plums and tomatoes out of baskets as I talked to Ted at the Hutten farm table so that I would be cajoled into buying them the pilfered goods. It was also opportune to have our rainbow kit from Kia at Today I Ate a Rainbow! as it gives us a chance to actually measure those green vegetables Bubs has apparently been feeding to the cat. It is also important to also eat food that is delicious, familiar and in the case of this aromatic soup, a healthy emulation of a not so healthy dish. The soup, though basic is flavourful and filling because of the large amount of kale which is why you only need a small amount of pork for each bowl.

The pork for this recipe came from a cheap cut but that does not mean it lacks in quality or protein and there are a lot of things you can do with those cheap cuts of meat - talk to your butcher or farmer at the local market, they really can help you. The kale came out of our CSA, making it local and no-spray and as with any leafy green vegetable, wash it well lest you end up with a gritty dish! I gave up using powdered stock a while ago because those things are filled with sodium and monosodium glutamate, otherwise known as MSG and I'm just not comfortable feeding that to my kids, if that is what you have on hand, I promise not to shun you. We do a fair amount of stovetop sears for our meat and then finish in the oven so it's imperative to have at least one pan with a snug fitting lid with a handle that won't melt all over the bottom of the oven.


Quick note: this is obviously not a vegetarian recipe but if you were to swap out the chicken stock for vegetable stock and use tofu (in the same spices) and you are golden for your veggie friends!

The Soup

Total cooking time: 30 minutes

3 cups/750 mL chicken stock
2 cups/500 mL hot water
2 onions, coarsely chopped
4 cloves garlic, minced
1 apple, finely chopped
bunch of kale, cut into ribbons
handful of spaetzle
olive oil

1. In a large pot heat olive oil until it easily slips across the bottom of the pot when tilted, at this point add the onion. At this point you could sip on a glass of wine and chat with your significant other while the onions slowly caramelize at a low setting or you could speed things up at medium heat because the kids are hungry and circling.

2. Add the garlic and apple and stir to mix, heat for a 3-4 minutes. At this point add the kale and stir around to gently wilt.

3. Add the hot water and stock - to save time it's important that your liquid is hot as opposed to using cold where you would have to wait for the entire thing to heat up.

4. Once the whole pot is simmering away, add your spaetzle. I used only a small amount because the soup is already hearty due to the kale. Cover and simmer for 20 minutes.

5. Season to taste with salt and cracked pepper.


The Pork

1/4 cup lemon juice
2 tbsp. sesame oil
1/4 cup soy sauce
1/2 cup water
1/2 cup brown sugar
2 tbsp. 5 spice
3 tbsp. coarse salt

pork back rib tips

1. Mix together first seven ingredients and poor over the pork rib tips, store in the fridge to marinate. This was Mr.'s part of the meal - he marinated for a couple of hours but ideally you could whip this together in the morning and leave throughout the day to stew in deliciousness.

2. When ready to cook, heat a pan on medium high heat with a tablespoon of olive oil in the pan. Sear the pork - should take about 3 minutes.

3. Pour the liquid into the pan and cover so that you can finish in the oven at 350º for 30 minutes.

4. Slice thinly and top the soup.

Sunday, September 19, 2010

Hearty Tomato Beans and Rice


As the summer months recede and the weather cools I feel drawn to savoury, warm meals that help stave of the chill that will only grow stronger in the coming months. Nova Scotia has a funny habit of wholeheartedly embracing each new season, roasting us in the summer and the only inkling you'll have that autumn is on its way are the cool nights. September, with the beginning of school would always bring jackets that were fine as long as you weren't moving but just a bit of running on the playground caused you to heat up, aggravated by the jacket. This is the perfect meal for this transitional time, it takes little energy throughout the day because it is prepared in a slow cooker but it's hearty and warm enough to get you through the night.

The adzuki beans, also known as azuki beans, are a smaller bean with a subtle nutty flavour that are most familiar in the form of red bean paste in various dim sum dishes. I originally hunted down these beans to make one of my favourite treats, red bean steam buns, but since I never got around to it I used a cup for this dish. If you plan on using dried beans, be aware that one cup of dried beans equals three cups of rehydrated beans so I'd be careful about going overboard. I always have the best of intentions when I buy my big bag of (cheap) dried beans; I am also woefully spontaneous and whenever I want to cook beans I am in need of them immediately. There is an obvious problem with these conflicting aspects of my personality. To quickly rehydrate beans, as opposed to that dreadfully slow process of allowing them to sit overnight in a bowl of water, bring beans (at a ratio of 1 to 4) to a boil for 2 minutes then lightly simmer for 1.5 hours.

The Recipe

1 cup dried adzuki beans - 3 cups cooked
1 cup dried soldier beans - 3 cups cooked
1 cup brown rice
1 onion, coarse chopped
2 tomatoes, coarse chopped
2 cups chicken stock
6 cups water
1/4 cup brown sugar
3 tablespoons soy sauce
1 tablespoon Hungarian paprika
1 tablespoon chili powder
S & P to taste

1. Rehydrate the beans (or cook if you are like me). It is not advisable to put the dry beans into the slow cooker because they simply won't cook in time.

2. Layer the rice, onions, tomatoes and beans in the crockpot. Top with the chicken stock and water. I like to reserve the spices and such until near the end of the cooking time. Cook on high for 4 hours.

3. Add the sugar, spices and soy sauce and mix it up.

4. Serve with a dollop with plain yogurt (the weird glob in the picture above). Enjoy!

The spices and sugar are, as always definitely to taste. The amount I added originally was perfect for me but when Mr. came home from work he added a touch more sugar and salt to his bowl.

Sunday, September 12, 2010

School Lunch: Veggie Pasta in Poppyseed Dressing


This was actually a dinner in the midst of summer but I really think it would translate well into a child's lunch, provided you included an ice pack. You do want your kids to have a lunch and not be the kid with the weird mom who gives stinky lunches, right? Unless your kid won't clean his or her room, then have at it mean mama (or daddy) and do as you will. Included on this dinner plate are fried green tomatoes which are delicious but I don't suppose they'd translate well to a school lunch.

I don't suppose it's obvious that you ought to prepare vegetables your children will eat. I have a secret for you, if you keep giving your kid veggies, they'll eat them. Really. Miss N never eats the carrot sticks whenever I put out a platter of hummus but since we have a ton of carrots thanks to our CSA I've been putting them in her lunch. Miss N has eaten those carrot sticks every single day. Be resolute about your children's health and it will happen.

The Poppyseed Dressing

3/4 cup buttermilk
1/2 cup plain yogurt
half onion, diced
1 tbsp. honey
3 tbsp. Poppyseeds
salt to taste

A note: If you do not have buttermilk or you have little people like mine who cannot tolerate cow's milk, use your usual milk and add about a teaspoon of lemon juice.

1. Stir all ingredients together. Allow to rest for a bit for the flavours to marry (isn't that precious?).

Vegetables

Your choice, chopped into bite-sized amounts

1. To blanche, cover in boiling water and allow to sit for a few minutes until the colour becomes vibrant and they just start to become tender.

Toss together with some cooked pasta, the vegetables and the dressing. The hardboiled egg comes in so that the little person in your life will have a punch of protein for energy. If you are so inclined, feel free to chop the egg onto the pasta.

Sunday, September 5, 2010

Chicago Style Steak w/ Spatzle

A warmth spreads before the hit of spice breaks on the tongue. The steak is tender and yields easily under knife, a line of bright pink running through its centre. I am not a big steak eater, it is often too heady for me, I much prefer the muted undertones of lamb or the springy flavour of pork but this steak, prepared by Mr. was phenomenal. To cool, at the side was spatzle, swirled in goat mozzarella and smokey Hungarian paprika.

Saturday, September 4, 2010

Hurricane Pizza

A hurricane swept across our provinve this afternoon and before Earl had a chance to knock out our power, Mr. And I rushed to get a pizza together. As we all know, cold pizza is delicious and while it would be piping hot for lunch, if need be dinner could be a little less warm.

The hurricane was largely anti-climactic for us, the power flickered once and the neighbour's near dead tree stayed upright. In any case, I had the bathtub full of water and who knows how many jars filled with water tucked in the fridge.

I slightly adapted the recipe for pizza dough from "The Art of Sicilian Cooking" by Anna Muffoletto.

A note: The recipe is written for mixing the dough by hand and while that would have been the case, my mom gave Mr. and I a stand mixer for our anniversary (yay!).

1 envelope active dry yeast (I used 1 tbsp.)
1/4 cup lukewarm water
1 cup lukewarm water
1/4 tsp. salt
3 1/2 cups flour (I used 1 less)
Olive oil

Preheat oven to 450.

1. Dissolve yeast in 1/4 cup lukewarm water. Let stand 5 minutes to bloom. The temperature of the water is very important, too hot or cold and it kills the yeast. Fingertip warm.

2. Pour 1 cup lukewarm water into bowl. Add 2 1/2 cups flour and the salt. Mix until it forms a ball. At this point Anna directs to add remaining flour, I did not.

3. Allow to rise, the recipe allots 1 hour but I had a hurricane on the horizon. Perhaps 20 minutes, it was sufficient.

Top with whatever you like and bake for 12-15 minutes. Enjoy!

Sunday, August 22, 2010

Gluten-free Banana Bread


Holy smokes! I'm back! The kiddies and I flew out to visit family and it was an incredible trip. The sun feels a bit closer to the Earth in the most southern part of Canada. I don't know if I can properly express how much I miss the way the morning mist swirls across fields to wrap up the trunks of solitary trees dotting the corners of bean, corn and wheat fields. I don't always catch this mist because by a decent time in the morning it has begun to burn up, only to work itself around the stems of flowers and trees and blanket the crickets as dusk settles.

I would not be a proper food blogger unless I mentioned the food. Oh, the food. My mom has a beautiful and tremendous garden and rest assured I took full advantage of it at mealtime. We had stuffed eggplant, fried green tomatoes, and just a plethora of fresh herbs that were clipped from the plants just steps from the door. The city is beautifully multicultural as there are sushi restaurants next to gluten-free bakeries, some of the best dim sum I have ever eaten (although there is an incredible place at the bottom of our street), Caribbean restaurants where the heat of the food heats the sidewalk. The cheese section at a privately owned grocer nearly made me cry, the variety of goat and sheep cheese was immense and a very helpful worker walked by my side to point to each cheese and explain its origins.

Upon returning home and after a good rest - did you know that staying up all night with your older brother at a campfire will result in you being incredibly tired? Who knew. But then, it won't really matter if it's the first time you've had the chance to properly hang out with him in a long time and you haven't even seen him in a few years.

After a tremendously long sleep and a day of blindly watching television I finally wandered back into the kitchen. The result was a perfectly moist banana bread with just a hint of cinnamon and gorgeous plump raisins. When baking banana bread, whether it is gluten-free or not, that sucker can dry out on faster than you would expect. At the one hour mark of baking, you will really need to start to keep a sharp on that bread otherwise you could have a pool of batter in the very centre or a dried out log.


The Recipe

2/3 cup sugar
1/3 cup butter
2 eggs
1 cup mashed bananas (about 4)
2 tsp. pure vanilla

10 g millet
20 g amaranth
40 g almond flour
2 tsp. cinnamon
1/2 tsp. guar gum
2 tsp. baking powder
1/2 tsp. salt

20 g plump raisins

1. Pre-heat oven to 350.

2. Cream the butter with the sugar. Add vanilla. Once the butter is smooth, mix in the mashed bananas and the eggs.

3. In another bowl mix all of the dry ingredients.

4. Add the dry to wet ingredients, mix well. Finally, add the raisins. Pour into a loaf pan. I didn't grease the pan because of the added oil coming from the almond flour.

5. Bake for 1 hour, perhaps 5-10 minutes more depending on your oven.

Friday, August 6, 2010

Photo Friday


Eggs • Bacon • Toast • Decadence

Sunday, August 1, 2010

Dinosaurs!

You tell your kids to eat their vegetables, brush their teeth, drink their (goat and soy) milk and generally really healthy stuff that makes the little monkeys roll their sweet little eyes and sigh. Or not because children are contrarian and one day they love pak choi and the next it is weird. The point is that you are likely doing your absolute best for your kids because you love the little creatures, but sometimes you need to be a cool mom or dad so you go to the market and after you safely tuck into your shopping bag the pork chops, eggs, zucchini and all those vegetables you'll cajole your children into eating, you wander down to Rosemary's Chocolates and swat little hands away from all the beautiful baskets of chocolate so you can buy a small bag of chocolate dinosaurs. Because a little chocolate is good for kids, and it's good for you to hear that your kids think you're awesome.

Friday, July 23, 2010

The Beach Sandwich

It is likely there will be sand in this sandwich as it was hastilly thrown together to prevent a fight between siblings. The ingredients will have been chosen after great deliberation in order to appease the ever-changing tastes of my children and my desire for healthy food. What the sandwich doesn't show was that today my daughter floated in the water without my help, my son wandered down to the water's edge to fetch a bucket of water without clutching his sister or mommy's hand. The beach sandwich won't tell the secrets of a young couple who were much sweeter than anyone could have given them credit. The beach sandwich is a humble sandwich, who risks bringing a whole bottle of mustard to the beach, but it was there for the sweetness of one day.

Thursday, July 22, 2010

Gluten-free Chocolate Chip Cookies!


It is difficult to properly introduce through written word a perfect gluten-free cookie. So often they are too crumbly or a weird, moist texture that is runny and spreads to create one giant cookie sheet shaped cookie. These cookies are not of that persuasion. These chocolate chip cookies are soft with enough firmness to hold up against an ice cold glass of milk and the flavour of the flours melds beautifully with the chips so that there is no after taste or even initial taste of the flours. I think this is my least favourite aspect of gluten-free baking: The flavour of the flours. I have found that an extra egg here, double the vanilla (always use real!) there and you are on your way to having this whole gluten-free baking thing figured out.

Today was an extraordinarily chilly and rainy day, particularly in comparison to the rest of the week where we have been at the beach in a state of melting. Today's weather made it perfect for baking cookies and an afternoon trip to the library. My little people are impressive bakers, Bubs is in charge of whisking the flours and Miss N always cracks the eggs and creams the butter. As it turns out, my job mostly involves making sure we have enough chocolate chips left for the cookies. It was a close call today.

We tried a gluten-free brand of chocolate chips that were fantastic, no unexpected flavour (anything alternative has the potential to be unexpected, I'm adventurous but the familiar is reassuring), the texture was top-notch as the chips melted and retained their shape. Remember the Friends episode were Monica applies for a job at the "Mocklate" company? Yeah, these chips aren't like that. Also, the chips are still chocolate and I certainly appreciate that. I regret that I threw out the bag before writing down the name... I'll check on it the next time I'm at the store.

The Recipe

98 g glutinous white rice flour (despite the name, it's safe!)
102 g millet flour
81 g amaranth flour
1 tsp. guar gum*
1 tsp. baking powder
1 tsp. salt
1 cup golden shortening - feel free to use butter, I used what I had in the pantry
3/4 cup white sugar
3/4 cup lightly packed brown sugar
2 tsp. vanilla
3 eggs, lightly whisked
2 cups gluten-free chocolate chips

*I've been given to understand from other food bloggers that many people cannot tolerate guar gum and use xanthan gum. I'm the opposite, go figure.

Preheat oven to 375 degrees.

1. Mix dry ingredients. Don't forget to whisk the flours so that it melds into one consistent flour.

2. Cream the shortening/butter and add the sugars and vanilla. Add the eggs and mix well.

3. Combine the two bowls. Once fully mixed, add whatever chocolate chips your kids haven't eaten.

4. Bake for 8-11 minutes. My children love to scoop out the cookies and I am not joking when I write that I've had to bake some cookies for close to 15 minutes, while the others were finished in a mere few minutes. Use your discretion, check the lovelies at about 7 minutes and judge from there, optimally the cookies should be a sweet golden brown.

5. Enjoy!

Saturday, July 17, 2010

A Summer Dinner

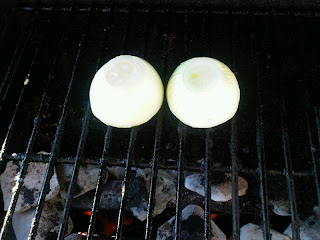
These little beauties are destined for the flame of our barbecue. The eventual destiny of the beautiful tuft of dill, I am currently unaware of, but I look forward to it. For a tragically long time I did not like dill, nay, I hated it. I still hate cilantro but I firmly believe that we should constantly try new foods and old foods because you never know when you will walk into your vegetarian restaurant, order the hummus and the sweet hipster in oversized glasses frames will pack a container of dilly hummus in your bag, thus sparking a revolution of taste/likes v. Dislikes for you. Let that be a lesson: Try food all the time. Do it gingerly, brashly or even blindly. Just get out there and do it.

Live blogging: Summer Dinner

We are now in the deep throes of summer. The sunlight has taken on a distinctly baked white quality and it is perfectly acceptable to delve so deeply into the type of book that is guaranteed to draw tears, laughter and sighs of contentment (and the unnerving feeling that you are in some ways like your least favourite character) that your loved one will quietly put away his own reading and gently placed two halves of an onion on the barbecue. Onion halves impart an inelegant image of love, but it's there.

Tuesday, July 13, 2010

On the go: A Birthday III

Do you want to know why this Tiramisu is so special? Because it is gluten-free? Certainly there is that, but also it was made by my mother-in-law and Miss N and my MIL has making a wonderful effort with her gluten-free baking. Every week Babs* makes the most delicious and crumbly corn muffins that also happen to be gluten-free. She passes it off as nothing but Babs has definitely figured out gluten free baking.

So, this is my creamy, decadent and perfectly crumbly and moist Tiramisu, courtesy of Miss N. and Babs.

* if it weren't obvious already that I have been protecting my loved ones' identities, I am.

On the go: A Birthday II

Mr. and I wandered into Pete's this afternoon and I don't even remember our original reasoning because I was soon mightily distracted. Oh, it was a beautiful, crisp sight of sandwich like no other - the colour was clear and bright, the ripple of feet perfectly formed. I saw only a corner of the beauty but I knew instantly, it is something I have long wanted, many times I have stretched my muscles to the breaking point in search of the perfect macaron. Here it was, happily tucked away. Behind glass.

How opportune to find these on my birthday and I was kind enough to share with Mr. (more than a courtesy share, too! We shared every one). The crunch of the outer shell collapsed into a tangy lemon cream and drew a blissful sigh and hip shake out of me. Even as I write these sentences I desperately want to dash out and weasel my way into that closed grocer and snatch up every macaron.

On the go: A Birthday

I had intended this post to be a series of live, on the go posts throughout the day but I lost track of time and now I am home. Today was my birthday which means I was ridiculosly spoiled, I mean you'd think my family really loved me or something, those lovely folk.

My day of decadence began with this mug. It is not any mug, this one will steep your loose leaf and it is pretty all at the same time.

A quick note: I am trying to figure out my new phone (another part of the super spoiling of me day) and I am writing the post on the phone. I don't know how to format yet ... I'll get it, promise!

Monday, July 5, 2010

Spoiled: An Extravagant Caesar Salad


sautéed romaine • honey chevre • lemon roasted chicken • potato croutons • sabayon


Saturday, July 3, 2010

The Humble Pea


Firstly, allow me to apologize for my absence these past few weeks. Mr. has been engaged in an incredibly exciting professional course (it's exciting because we won't be poor students raising children) that has sucked up every last moment of our time; at the end of the day once the kitchen is cleanish and the little people are sleeping I could just about muster the energy to watch Law & Order re-runs. The weather has been beautiful, the sunlight a perfectly muted gold that warms your arms and cheeks but pulls back before it cooks you. That type of weather begs to have children run around in it, happy and free of a cold Nova Scotia winter.


Miss N. and Bubs greatly appreciate a birthday and this past Thursday was Canada's birthday and while we made it down to the fireworks (they were mesmerized and smitten), we spent the early evening eating fresh peas and strawberries. The crazed week of driving around, too much takeout and the scramble to just get around melted away with the snap of each pea. I think this was my favourite part of the day, never mind the excitement of the harbour front, being able to sit with my babies and eat fresh produce from a farm just a short distance away was my highlight.


The giggles, the mess and the sweet sharing between brother and sister who will easily fight over a broken toy was because of the humble pea. The stress of the week, that palpable mess of constant activity without result split apart with each pea and was cast aside into the growing pile spent shells.

Wednesday, June 23, 2010

Sautéed Chorizo and Pak Choi Chips


Today was the first day of our first CSA (that's a mouth full) and I'm not sure we could be any more excited. Mr. and I have been patrons of our farmer's market for years but we have never been able to sign up for a CSA because we have been students forever and it usually takes a rather sizeable chunk of money for a share. We lucked out because the Hutten Family Farm has established a CSA that is affordable and generally fantastic because it's a bin filled with beautiful greens, carrots, apples and the sweetest peas that I had to force myself to leave because I would have eaten the whole bag in one sitting.

We had a few fresh sausages kicking around in the fridge and they also happened to be gluten-free so dinner was looking up. The kids had the 'Gourmet' version which was gently spiced with a hint of fennel whereas our chorizo had a great flavour but was it ever spicy! Mr. and I spooned a bit of goat yogurt on top to quell the heat and allow the flavours to come through. If you are in and around Halifax and you are looking for gluten-free sausages, check out Pete's Frootique. Their in-house sausages (the Gourmet, Chorizo and ... another one that I did not buy) are all gluten free. I really love Sweet Williams' line of sausages because they are delicious and local but I am unsure if they are gluten-free. If you know, let me know!


Pak Choi Chips

4-5 pak choi (the little bunches, not the individual leaves!)
olive oil
sea salt

1. Preheat the oven to 350.

2. Slice the stems off the pak choi and lay on a lined cookie sheet. I lined mine with a silicone baking sheet, feel free to use parchment paper or silpat.

3. Drizzle just a bit of olive oil and sprinkle the sea salt on the leaves.

4. Bake for about 15 minutes or until crispy.

5. Enjoy!

Sautéed Sausage

half onion
two chorizo sausages (make sure they are fresh, not dry cured)
yogurt to taste
fresh peas
olive oil
optional: half apple (or a whole - we currently have massive jona golds)
tablespoon white wine

1. Dice onion and add to heated pan with olive oil. Stir around and allow to soften for about 3-5 minutes.

2. Cut a seam into the sausages and pull out the meat. Break it into chunks and add to the pan.

3. Cook for about 8 minutes. I did not add any extra salt because the sausage is salty enough on its own. If your chorizo is spicy you can add the diced apple and white white for a bit of sweetness. Cover to all the wine to cook down.

4. Plate the sausage and apples, sprinkle with the fresh peas and top with a few spoonfuls of yogurt. Serve with the pak choi chips.

Saturday, June 12, 2010

Gluten-free Red Velvet Cupcakes


I am a private person. I bristle when my life is discussed, when my sense of self is put on display and fodder for others interests. And then I have this outpouring and everyone is so kind that it amazes and makes me cry. I sometimes tire of my gluten intolerance and it's frustrating, mostly because I cut out gluten for one reason and when that didn't work I couldn't just go back to eating bread and all kinds of good wheaty things and that sucks. I know that makes me sound like a 15 year old but it's true. My gluten intolerance wasn't linked to my bipolar, it didn't fix my brain but it certainly fixed the rest of my body. It's a good thing that I stopped eating gluten. It really is.


As a way of breaking out of this baking slump I took the advice of Chef Dennis and wandered back into the kitchen. I poked around in the cupboards, watched an episode of Triple D, snooped in the kitchen and went online. It was while I was monitoring Twitter for any suspicious behaviour, such as recipes I had not yet seen, I discovered Jenna from Eat • Drink • Pretty and her Red Velvet Cupcakes. Obviously I would not be able to follow her recipe exactly but I was able to make this gluten free and I was really proud of the delicate texture and flavour of these cupcakes.

However, I'm not going to share with you. Yes, I am. The recipe is below. There was a mishap with the notebook which contains the recipe.


The Recipe

note: I think I might be overzealous with my flours but this garnered a fantastic texture.

57 g rice flour
57 g quinoa flour
37 g chickpea flour
70 g teff
30 g corn flour
3 tbsp. cocoa powder
one teaspoon baking soda
one teaspoon salt
one teaspoon guar gum/xanthan gum (I prefer guar gum, use what you like!)

one cup goat milk w/ tablespoon of vinegar*

2 eggs
1.5 half cups sugar
3 tsp. vanilla (seems like a lot - I find I need more with gluten-free baked goods)
half cup oil (should be neutral, I did use olive because it's all we had)
one tablespoon red food colouring

*This is instead of buttermilk. My babies (all three of them) are intolerant of cow's milk but they can have goat. If you do not imbibe any dairy, the same ratio applies to soy milk in order to make the curdled buttermilk!

1. Mix together the dry ingredients. Those are conveniently separated in the first batch!

2. Mix together the wet ingredients, the batch of all wet stuff in the last grouping.

3. Add the dry to the wet, alternate with the buttermilk. Since this is gluten-free it is extraordinarily runny, I don't remember wheat based cakes being this runny.

4. Fill lined cupcake pans. Bake at 325* for 15-20 minutes. Remember my tremendous muffin tins? I also have super small cupcake tins. Yup, only extremes around here ... we shan't mention the crazy. :)

Traditionally, red velvet cake is served with cream cheese icing. Like usual, I have used goat quark. I love quark because it is a lot lower in fat than other cream cheeses, my beloved babies can eat it First, allow me to apologize for the Wikipedia. In my other life as a university student it is seriously frowned upon, though I do have an unhealthy addiction to it!

The Icing

4 tbsp. quark
1.5 cups icing sugar
hot water (splash)

Mix all ingredients together. The hot water is there to thin it out if you find the icing is seizing and will not mix.

The crumb on these cakes had me so impressed and -dare I say it- proud of my new baking skills. I love baking, the properties of gluten free baking have pulled the rug out from beneath me. It's a journey, and we never really get there, but isn't that the point?