Showing posts with label gluten free recipes. Show all posts

Thursday, January 6, 2011

Kitchen Sink Stew


Bowl

There is a movement in the blogosphere for people to clean out their fridge and pantry this January, to resist the urge to constantly purchase new groceries, which allows great food to go bad. There is so much you can do with just a little creativity and as a food blogger, isn’t this what we should be inspiring? I rarely follow a recipe and if you ask anyone with basic cooking skill they will tell you the same thing. Do you want to know why? We’re creative out of necessity. If I was to purchase new ingredients for one recipe every single night I’d be broke; well, significantly more broke than I already am. Ours is a family without a lot of money but Mr. and I always ensure our children have good food and one of the ways we have been able to accomplish this is through our CSA share (community supported agriculture) in the Hutten Family Farm; for $20 a week we receive an incredible amount of vegetables (and fruit) that is local, spray-free and grown by a man we consider our friend. It would be an insult to Ted if we allowed those vegetables to rot in any way.

All these thoughts were swirling in my head yesterday morning when I opened the refrigerator door to find it absolutely full of vegetables. If you looked in our pantry, potato box and refrigerator you might begin to doubt that I actually feed my family, but I do. I really, really do. It was in this spirit that I began chopping parsnip and carrots, an entire leek and tearing apart a bag of kale to throw into the slow cooker. It didn’t take long before it was absolutely packed, including a can of corn because not only do I need to clean out the fridge, I need to attack the pantry.

I don’t use the slow cooker very often, even though I intend to do so which means that my slow cooker recipe skills are a little shaky. I was fairly confident about all the veggies and lentils swirling around in there but Mr. was not. Upon coming home Mr. discovered that my overzealous amount of kale had entirely overpowered the whole dish and if you are not careful, kale can be quite bitter. I had laid down for a rest so he was given free reign to do as he wished with what I intended to be a vegetarian dish. I was so serious about this vegetarian dish that I emptied what little I had in the way of lentils – note, usually a good idea to check you have the ingredients for a dish, resorted to one of those dried soup mixes of green and orange lentils and alphabet noodles and went on my merry way. Mr., so unimpressed with the mess of vegetables and lentils added a can of pulverized tomatoes and pork. Just your classic vegetarian dish with a smattering of pork.

I may have mentioned that I was a vegetarian for an extended period of time and Mr. joined me in that endeavor but that was before we were married and I’m not entirely sure how true his devotion was; he was the one who bought the lamb when we gave it up.

The dish, which Mr. calls chili and I think he is basing this on the presence of the crushed tomatoes turned out beautifully. If he hadn’t made the adjustments I think my moniker of “mean Mommy” might have stuck. I’m not really that mean but he’s definitely more fun for the kids. I make them bathe and pick up their toys. All that kale was toned down and the five spice he used on the pork added this unexpected depth to the whole dish even though he used very little of it. It’s an incredibly healthy dish based on the number of vegetables used and because I used just about everything I could get my little paws on, it’s open to all kinds of interpretations.

The recipe isn’t going to be exact for two reasons. First, my parents bought me this incredible slow cooker for me for Christmas and it is massive, seven liters massive. Second, the whole point of this stew was to use up as many vegetables as I could so it depends on the state of your own refrigerator, do, as your tummy desires. I’m really just trying to apologize for the disorganized state of this recipe but I’m doing this for you, novice cook (remember how I bathe my kids and make them pick up their toys?): I’m forcing you to be creative. You’ll thank me later.

Quick note: I’d like to list this recipe as gluten free but the only thing that is making me nervous is the 5 spice. Mr. picked up our (huge) bag at Tian Phat, an Asian grocer in Halifax and he is sure that is gluten free. It should be considering it is only 5 spices (heh) but you never know and if you are on a gluten free diet I don’t really have to tell you to read the label carefully.


kitchen sink stew

The Stew

3-5 carrots, sliced thick

1-2 sweet potatoes, sliced into medallions

1-2 parsnips

leeks, minced – I used 4 inch knob, about 1 inch diamter

1 onion

bag of kale, roughly torn apart off of stem

1 can corn kernels

4 cloves garlic, minced

¼ cup white wine

1 ½ cup water

8 oz pork, cubed

1 can diced tomatoes

5 spice

S & P to taste

1. Add all of the ingredients expect the pork and tomatoes (this includes the liquid), salt and pepper to taste. Cover the slow cooker and cook on high for 2 hours. After the 2 hours, reduce to low for about 6 hours.

2. At the 6 hour mark, toss the cubed pork in the 5 spice and sear in a pan with a bit of oil. Add the pork and tomatoes to the slow cooker. Stir and cover. Keep on low heat for another hour.

You could serve this over brown rice to round out the meal, perhaps with a salad but in all honesty it’s very filling and you could do with just a bowl of it.

Sunday, August 22, 2010

Gluten-free Banana Bread


Holy smokes! I'm back! The kiddies and I flew out to visit family and it was an incredible trip. The sun feels a bit closer to the Earth in the most southern part of Canada. I don't know if I can properly express how much I miss the way the morning mist swirls across fields to wrap up the trunks of solitary trees dotting the corners of bean, corn and wheat fields. I don't always catch this mist because by a decent time in the morning it has begun to burn up, only to work itself around the stems of flowers and trees and blanket the crickets as dusk settles.

I would not be a proper food blogger unless I mentioned the food. Oh, the food. My mom has a beautiful and tremendous garden and rest assured I took full advantage of it at mealtime. We had stuffed eggplant, fried green tomatoes, and just a plethora of fresh herbs that were clipped from the plants just steps from the door. The city is beautifully multicultural as there are sushi restaurants next to gluten-free bakeries, some of the best dim sum I have ever eaten (although there is an incredible place at the bottom of our street), Caribbean restaurants where the heat of the food heats the sidewalk. The cheese section at a privately owned grocer nearly made me cry, the variety of goat and sheep cheese was immense and a very helpful worker walked by my side to point to each cheese and explain its origins.

Upon returning home and after a good rest - did you know that staying up all night with your older brother at a campfire will result in you being incredibly tired? Who knew. But then, it won't really matter if it's the first time you've had the chance to properly hang out with him in a long time and you haven't even seen him in a few years.

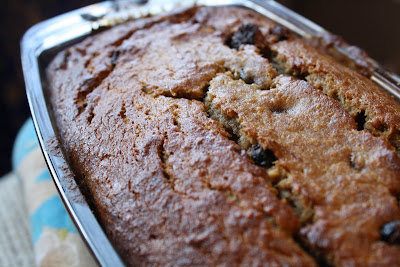
After a tremendously long sleep and a day of blindly watching television I finally wandered back into the kitchen. The result was a perfectly moist banana bread with just a hint of cinnamon and gorgeous plump raisins. When baking banana bread, whether it is gluten-free or not, that sucker can dry out on faster than you would expect. At the one hour mark of baking, you will really need to start to keep a sharp on that bread otherwise you could have a pool of batter in the very centre or a dried out log.


The Recipe

2/3 cup sugar
1/3 cup butter
2 eggs
1 cup mashed bananas (about 4)
2 tsp. pure vanilla

10 g millet
20 g amaranth
40 g almond flour
2 tsp. cinnamon
1/2 tsp. guar gum
2 tsp. baking powder
1/2 tsp. salt

20 g plump raisins

1. Pre-heat oven to 350.

2. Cream the butter with the sugar. Add vanilla. Once the butter is smooth, mix in the mashed bananas and the eggs.

3. In another bowl mix all of the dry ingredients.

4. Add the dry to wet ingredients, mix well. Finally, add the raisins. Pour into a loaf pan. I didn't grease the pan because of the added oil coming from the almond flour.

5. Bake for 1 hour, perhaps 5-10 minutes more depending on your oven.

Thursday, July 22, 2010

Gluten-free Chocolate Chip Cookies!


It is difficult to properly introduce through written word a perfect gluten-free cookie. So often they are too crumbly or a weird, moist texture that is runny and spreads to create one giant cookie sheet shaped cookie. These cookies are not of that persuasion. These chocolate chip cookies are soft with enough firmness to hold up against an ice cold glass of milk and the flavour of the flours melds beautifully with the chips so that there is no after taste or even initial taste of the flours. I think this is my least favourite aspect of gluten-free baking: The flavour of the flours. I have found that an extra egg here, double the vanilla (always use real!) there and you are on your way to having this whole gluten-free baking thing figured out.

Today was an extraordinarily chilly and rainy day, particularly in comparison to the rest of the week where we have been at the beach in a state of melting. Today's weather made it perfect for baking cookies and an afternoon trip to the library. My little people are impressive bakers, Bubs is in charge of whisking the flours and Miss N always cracks the eggs and creams the butter. As it turns out, my job mostly involves making sure we have enough chocolate chips left for the cookies. It was a close call today.

We tried a gluten-free brand of chocolate chips that were fantastic, no unexpected flavour (anything alternative has the potential to be unexpected, I'm adventurous but the familiar is reassuring), the texture was top-notch as the chips melted and retained their shape. Remember the Friends episode were Monica applies for a job at the "Mocklate" company? Yeah, these chips aren't like that. Also, the chips are still chocolate and I certainly appreciate that. I regret that I threw out the bag before writing down the name... I'll check on it the next time I'm at the store.

The Recipe

98 g glutinous white rice flour (despite the name, it's safe!)
102 g millet flour
81 g amaranth flour
1 tsp. guar gum*
1 tsp. baking powder
1 tsp. salt
1 cup golden shortening - feel free to use butter, I used what I had in the pantry
3/4 cup white sugar
3/4 cup lightly packed brown sugar
2 tsp. vanilla
3 eggs, lightly whisked
2 cups gluten-free chocolate chips

*I've been given to understand from other food bloggers that many people cannot tolerate guar gum and use xanthan gum. I'm the opposite, go figure.

Preheat oven to 375 degrees.

1. Mix dry ingredients. Don't forget to whisk the flours so that it melds into one consistent flour.

2. Cream the shortening/butter and add the sugars and vanilla. Add the eggs and mix well.

3. Combine the two bowls. Once fully mixed, add whatever chocolate chips your kids haven't eaten.

4. Bake for 8-11 minutes. My children love to scoop out the cookies and I am not joking when I write that I've had to bake some cookies for close to 15 minutes, while the others were finished in a mere few minutes. Use your discretion, check the lovelies at about 7 minutes and judge from there, optimally the cookies should be a sweet golden brown.

5. Enjoy!

Saturday, June 12, 2010

Gluten-free Red Velvet Cupcakes


I am a private person. I bristle when my life is discussed, when my sense of self is put on display and fodder for others interests. And then I have this outpouring and everyone is so kind that it amazes and makes me cry. I sometimes tire of my gluten intolerance and it's frustrating, mostly because I cut out gluten for one reason and when that didn't work I couldn't just go back to eating bread and all kinds of good wheaty things and that sucks. I know that makes me sound like a 15 year old but it's true. My gluten intolerance wasn't linked to my bipolar, it didn't fix my brain but it certainly fixed the rest of my body. It's a good thing that I stopped eating gluten. It really is.


As a way of breaking out of this baking slump I took the advice of Chef Dennis and wandered back into the kitchen. I poked around in the cupboards, watched an episode of Triple D, snooped in the kitchen and went online. It was while I was monitoring Twitter for any suspicious behaviour, such as recipes I had not yet seen, I discovered Jenna from Eat • Drink • Pretty and her Red Velvet Cupcakes. Obviously I would not be able to follow her recipe exactly but I was able to make this gluten free and I was really proud of the delicate texture and flavour of these cupcakes.

However, I'm not going to share with you. Yes, I am. The recipe is below. There was a mishap with the notebook which contains the recipe.


The Recipe

note: I think I might be overzealous with my flours but this garnered a fantastic texture.

57 g rice flour
57 g quinoa flour
37 g chickpea flour
70 g teff
30 g corn flour
3 tbsp. cocoa powder
one teaspoon baking soda
one teaspoon salt
one teaspoon guar gum/xanthan gum (I prefer guar gum, use what you like!)

one cup goat milk w/ tablespoon of vinegar*

2 eggs
1.5 half cups sugar
3 tsp. vanilla (seems like a lot - I find I need more with gluten-free baked goods)
half cup oil (should be neutral, I did use olive because it's all we had)
one tablespoon red food colouring

*This is instead of buttermilk. My babies (all three of them) are intolerant of cow's milk but they can have goat. If you do not imbibe any dairy, the same ratio applies to soy milk in order to make the curdled buttermilk!

1. Mix together the dry ingredients. Those are conveniently separated in the first batch!

2. Mix together the wet ingredients, the batch of all wet stuff in the last grouping.

3. Add the dry to the wet, alternate with the buttermilk. Since this is gluten-free it is extraordinarily runny, I don't remember wheat based cakes being this runny.

4. Fill lined cupcake pans. Bake at 325* for 15-20 minutes. Remember my tremendous muffin tins? I also have super small cupcake tins. Yup, only extremes around here ... we shan't mention the crazy. :)

Traditionally, red velvet cake is served with cream cheese icing. Like usual, I have used goat quark. I love quark because it is a lot lower in fat than other cream cheeses, my beloved babies can eat it First, allow me to apologize for the Wikipedia. In my other life as a university student it is seriously frowned upon, though I do have an unhealthy addiction to it!

The Icing

4 tbsp. quark
1.5 cups icing sugar
hot water (splash)

Mix all ingredients together. The hot water is there to thin it out if you find the icing is seizing and will not mix.

The crumb on these cakes had me so impressed and -dare I say it- proud of my new baking skills. I love baking, the properties of gluten free baking have pulled the rug out from beneath me. It's a journey, and we never really get there, but isn't that the point?

Tuesday, June 1, 2010

Lamb Chowder ... or is it Stew? Soup?


I cook without formal training. I will often hold two herbs up to my nose and sniff to see if they match. That's my big secret. Sometimes I line up three bunches of herbs and drift my nose back and forth, attempting to isolate the perfect pitch of flavour. I rely on my sense of smell as much as I do my sense of taste, perhaps even more so. I believe cooking is instinctual, I dream about the flavour combination I plan on making, I text myself kitchen missives when out and my favourite store is a gorgeous grocer that specializes in local produce and imported and specialty items. I love playing with food and sometimes dinner is a learning experience and sometimes it really, really works.

The original platter of deliciousness.

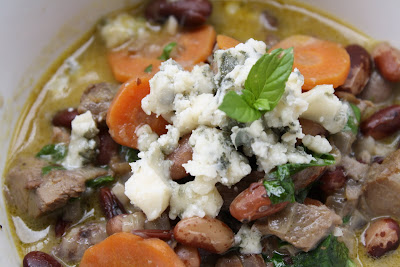
This dish is not easily classifiable. Mr. thinks it was more of a chowder but I was channeling stew as I diced the onions, chopped the carrots and stirred in the hearty hunks of lamb. The lamb was from dinner the night before, a lovely meal of beets, sweet potatoes and the most tender and delicious lamb I have ever eaten. Mr. slowly roasted the lamb in red wine, fennel and onions. At least, these are the main spices (and root vegetable) I am aware of; I've been dealing with my own cold as well as the babies' collective stuffy noses. The beans and meat give this meal a stew-like consistency but the milk throws it off entirely and transforms it into the chowder. This is Mr.'s reasoning and he's not relenting so we'll go with chowder. I think chowder stew thing of yumminess is more apt.


The Recipe

one onion, diced
3 carrots
2 cups beans (I used soldier and red kidney beans)
8 oz. cooked lamb (fennel, rosemary, rhubarb, red wine, pink and black peppercorns*)
3-4 cloves garlic, minced
1/4 cup red wine
8 cubes pre-made stock (these are ice cubes, not those powder things)
one cup almond milk**
decent handful of spinach
S&P to taste

1. Sweat the onions in butter that has been slowed with olive oil.

2. Add the carrots and beans. At this point add the red wine and 3-4 cubes of stock. I always use this for stock. Cover and let it simmer to cook the carrots. I had to leave mine for a bit because my beans were half-cooked. If your beans are in better shape, use your own discretion.

3. Chop the lamb into one centimetre square pieces and add to the pot. Basically a good (big people-sized) spoonful of the chowder will have a bite of lamb, at least one bean and a carrot.

4. Add the last of the soup stock and the almond milk. Lower the heat to about medium low so that the almond milk doesn't scald.

5. Chop the spinach into strips and add to the pot just a few minutes before serving. Don't forget to salt and pepper to your taste!

*Mr. gave up his spice mix! You would definitely have to change the order in which you add/cook the ingredients of this stew but with this spice mix you could emulate it! Yum! Plus, if you are vegetarian (uh, not sure why you'd be reading this post all the way to this point, but if you are, thanks!) you could forgo the lamb and fake the flavour. Score.

**Usually I would have used goat milk because soy milk is a total pain when it is cooked because it curdles, not in a make you sick way but in a really, really annoying way. The almond milk seemed able to hold its own and the only adjustment I needed to overcome its sweetness

Mr. does almost all my plating because I am not very good at the balancing and pretty-fying aspect of food. He topped our stew with Roquefort and the kiddies and my mom had Drunken Goat (a hard goat cheese). The stew wasn't overly heavy so it's really perfect as a spring chowder and it will cure the common cold. Really.*

*This isn't true. That's why the common cold is so damn awful.


Saturday, May 29, 2010

Fun with Leftovers: A Take on Chicken "Alfredo"


I have a habit of packing up leftovers with the best of intentions and then never using them. This habit is much different than my penchant for freezing raw ingredients like egg whites, bananas on the turn and filling the stock container because I have absolutely no problem using the raw ingredients. In our house, we rarely eat the same thing twice and leftovers somehow get left in the cold and I really hate wasting food. To be fair, we rarely have leftovers but every once in a while there is a container tucked in the fridge. This dinner was borne out of a container of beautiful barbecued chicken drumsticks and beets and Miss N.'s request for spaghetti.

I am also unable to make a decent "white sauce" for pasta. I'm serious, the delicate creaminess combined with a great flavour always escapes me. I can only achieve one aspect of a North American cream sauce. I don't know why and if I want something more traditional-like I have to rely on Mr. ... I am sure you have noticed that I am dancing around calling this sauce "alfredo". That is because that heavy white sauce all gluten-intolerant people fear is not actually alfredo. In my trusty and very old "Mama Leone's Italian Cookbook" has a beautiful recipe for Fettucini al'Alfredo of Rome and the sauce is simply 3/4 cup fresh creamer butter and 6 tablespoons freshly grated parmesan. How simple is that?


All of that ramibling aside, I didn't follow my own strict food rules. This is totally the North American version of alfredo. Ahem. In a way. Remember how I have to cheat when it comes to creamy sauce? Here's how:

The Sauce

one sweet onion
3 gloves garlic
1/2 block medium tofu
splash of soy milk
S&P to taste

1. In a pan on medium heat add the diced onion. Sweat the onion to release its juices and begin the caramelization. You are not actually going to brown the onions, just cook until translucent.

2. Add the garlic.

3. The tofu (the secret ingredient!): blend it until smooth in the blender. I use a medium tofu and with just a splash of milk it is efficiently turned into a really thick "heavy cream". Yeah, that's right. Add it to your onions and garlic. Stir until heated through.

When you pasta is cooked al dente, don't you dare rinse it. I'll be very unhappy with you. Why? All that starch on the pasta (yes, it is on gluten-free pasta) binds the sauce to the pasta and that's how you get flava! Really. To prevent the pasta from sticking together put it back in the empty pot and spoon some of the sauce over the pasta and stir. When ready, plate your pasta then pour the rest of the sauce over the pasta. Ta da! Fancy pants pasta at this point it is completely vegan. For the next part you can nix the chicken if you want to keep it vegetarian.

We're not done.


The Chicken and Beets

3 cooked chicken drumsticks (mine were barbecued by Mr. the night before.)
barbecued beets (again, barbecued by Mr. Barbecue)
a handful of herbs from the garden*

1. Dice the chicken (obviously once it is off the bone!) and quarter the beets. I used striped candy beets from Ted Hutton at the Halifax Farmer's Market.

2. Sauté in a hot pan with olive oil.

3. In your pestle and mortar mash up your herbs with coarse salt (the roughness of the salt helps break up the herbs) and a dash of olive oil.

4. Add to the chicken and beets. Stir for a minute then add this to your plated pasta. If you read this recipe the timing is off, obviously don't plate the pasta then do the chicken. I'm sure you can all multi task!

*The herbs: It's up to you. The sauce on the pasta is a lovely base that supports your preferences. I used a generous handful of garlic chives, minette basil and purple basil.

Top the chicken with slices of parmesan, obviously I used a goat parmesan from Rancher's Acres and it was perfectly firm and crumbly with just a great punch of saltiness. There you have it, perfectly gluten free, full of protein and you can use up some leftovers! Feel free to mix up the veggies, I always see a recipe as a loose guide. In fact, I was sewing the other day when I realized I rarely follow directions to anything... sometimes it works, sometimes it doesn't but I follow my own vision. You should do the same.

Tuesday, May 25, 2010

Rhubarb Banana Gluten-Free Muffins

Bubs is sure he wants the muffin in front.

I am in the throes of a full-fledged rhubarb obsession. I was so easy to dismiss this beautiful fruit? vegetable? stalk of deliciousness? when I was a teenager that now I feel like I need to seriously make up for my prior dismissive attitude. What gets me the most is that my mom has enough rhubarb to build a house out of it and I always turned my snooty little teenage nose up at it and now I live a couple of provinces away. Teenagers are such brats, but then again, if they weren't I'd have to share the world's rhubarb and I can be territorial.


No, no. He thinks he wants this one.

Another recent obsession of mine has been figuring out how to make a decent gluten-free crumble. I love(d) crumbles but since oats are off-limits, even though there are gluten-free oats in the world I'm still leery, so I'm left to figure it out myself. Lauren at Celiac Teen has something that I think is definitely coming close (good call on the tapioca pearls!) with a crumb mix which I've filed away in my little brain with all the other half-recipes I have floating around in there. My make-shift "crumb" is alright but I'm not completely satisfied with it. The reason why I'm adding it here is so that perhaps someone will have a suggestion and also because in this form it's still pretty yummy! Ideally I would add coconut flour and brown sugar to the amaranth and shredded coconut to really bring out that crumbly mix but unfortunately I did have any brown sugar. As for the coconut flour, I'm still a bit annoyed with coconut flour after the macarons fiasco and it's keeping it's tropical little butt out of here, i.e. I haven't bought any more.

This recipe yields about 6 giant muffins but I'm sure that I could have expanded on that if I had added a touch more liquid. I'm finding that gluten-free baking has completely ruined
re-worked my baking confidence and everything I thought I knew about baking. Mr. and I used to have a farmer's market based baking business and all that experience is kind of out the window. I'm getting there but it's a process. The properties I always took for granted when working with wheat flour have fled like the cat when Bubby is stomping around and pretending to be a monster.

Here I am, editing and finishing this post a few days after I started writing it. What that means is that the original recipe has been completely transformed and only good things have come with that time. This recipe is perfect for a morning batch of muffins because it is packed full of protein (that means energy!) without the fat but it still full of flavour. My whole family loved them, Bubby actually tried to con us into letting him eat two at breakfast yesterday! If you wanted to save time you could always throw together your dry ingredients the night before and just stick it in the fridge. If you do this, do not (I mean it!) mix your dry with wet: Baking powder has a lifespan of about 30 minutes once it comes in contact with moisture. You'll have very yummy pucks if you do this, how do I know this? Mr. and I tried to save time one week for the baking business by pre-mixing a bunch of the recipes. Come Friday morning (the day before market) we were out of ingredients and full of little disks. Not cool.

Secret deliciousness.
The Recipe

65 g white rice flour
45 g teff flour
45 g quinoa flour
45 g soy flour
20 g arrowroot flour
6 g guar gum*
3 tsp. baking powder
1/2 tsp. salt
2 tbsp. cinnamon
2 eggs
100 g sugar
1/2 cup yogurt (I used a rich, plain goat yogurt.)
3 bananas
4 tbsp. soy milk/horchata
2 tsp. vanilla

reserve: rhubarb mint jam and quark - or another creamy, tangy cheese. I get my quark from Ranchers Acres, a goat farm in the Annapolis Valley. Their products are simply beautiful. If you do not have rhubarb jam you could aways stew a couple of stalks of rhubarb and use that, have fun with it!

1. In one bowl mix all your dry ingredients. I like to use a whisk it until it is very fine and you can't see where one flour begins and the other ends.

2. In a separate bowl mix the wet ingredients, except the milk. This will be used later if you find the batter is too thick.

3. Make a well in the dry ingredients, pour in the mix of wet ingredients and stir.

4. If needed (I certainly did!) add the milk and until a smooth batter.

5. Ladle into greased muffin sheets. Only fill the cups halfway because this is where you add the secret delicious part. Spoon about a dessert spoon each of rhubarb jam and quark (you could use any soft, tangy cheese). Cover completely with more batter. Sprinkle the crumb mix on top.

6. Bake at 350F for 30-35 minutes or until a toothpick in the centre comes out clear.

My muffin pans are quite large, if yours are not so big adjust the time down. The first time I made this recipe I set the time for 20 minutes and then judged from there, you should no doubt do the same thing if you are concerned about over-baking.

The Crumb Mix

Oh, this baby came about after great trial and error, and most of my amaranth. I also made about 8 million cups too many.

In a non-stick pan combine equal parts shredded coconut and amaranth. Toast on medium heat for about 5-10 minutes. After it has started popping a bit (it really does sound like popcorn!), sprinkle approximately a tablespoon of white sugar on top. Toss a couple of times and remove from heat.

I store the extra in a tupperware container in the fridge. It keeps really well and it is a fantastic coating for chicken (thank you hubby!). It's pretty versatile so you can definitely keep it around for a bit.

I am not much of a breakfast person, though I do love my brunch! That being said written, I could definitely eat these muffins every morning! I always end up using soy flour, despite my reservations about soy ... does anyone have an alternative they like? I am still fairly new to gluten-free baking and I'm still testing all my options.

Horchata Fortified: A New Spin on "Rice Milk"


My kitchen table isn't really that dirty. This a yard sale find in need of refinishing!

This past Sunday morning I was absentmindedly watching the Food Network and playing on the computer when a little something piqued my interest: rice milk, more specifically horchata.

Horchata is a sweet rice milk, originating from Mexico; there is a Spanish link but I am not exactly an expert in Mexican food history. What had me truly interested, enough to ignore the host's exuberance on my quiet Sunday morning, was that this horchata had the potential to be a replacement for soy milk. I tend to use goat milk in my cooking so the majority of soy in the children's lives comes from soy milk but it does have me a bit concerned. Bubby (a.k.a. the Boy) won't drink goat milk, unlike his sister who would possibly (and I hope only temporarily) sell her brother for goat milk, that's how much she loves it. If you are unfamiliar with goat milk .. well, let's just say that the muskiness of some goat's cheese isn't for nothing.

My sweet babies are trained to be skeptical of any new food they may encounter and there is nothing cuter than a 2 year old asking, "dis have cow milk in it?". I think I have found success with this horchata: Miss N. (a.k.a. Girly) and my mom were immediate fans, Bubby needed a bit of coaxing and Mr. seems to like it. I am excited about the potential of this recipe: For the first batch I used vanilla and cinnamon to break us into it (I despise wasting food), just in case the texture was off it would still be palatable. I didn't have anything worry about, this is fantastic! There is a slight earthiness from the quinoa and all the starch from the rice lends a beautiful silkiness that I absolutely love about our favourite soy milk.


I wasn't overly worried about timing when I made the original batch because the kiddies were off at their grandparent's for the week-end. As soon as we get through this batch (which won't take long at the current rate!) I plan on tweaking it a little in order to do a stove-top version. The Food Network show I was watching was with a host named Sunny and she prepared her's very quickly on the stove, also, she added peaches for a sweet, spring flavour. I think this recipe is a great base for further experimentation. After all, that's what we're all doing in the kitchen, right? Playing around and experimenting. Now that we're all adults, ignore mom's advice: Play with your food!

The Recipe

1 cup white rice
1 cup quinoa
4.5 cups water (plus and addition 2-3 for later)
3 cinnamon sticks
sugar to taste (I think I used about 1.5 cups)
tablespoon vanilla, if you are so inclined

1. Grind the quinoa and rice into a fine grit. I used our very old and very cheaply made kitchen wizard blender thing and though it smoked and growled at me, it got the job done.

2. In a bowl combine the 4.5 cups water, cinnamon sticks, quinoa and rice. Cover and stick it in the fridge.

3. Find something that will keep you busy for the next day or two, hence the need to adapt this recipe to the stove top!

4. After staring at your fridge for almost two days, remove the bowl. Strain through a metal sieve. The water should be a really creamy white and it is gorgeous! I wanted to drink it but restrained myself: Keep in mind that it is starchy water. Yuck.

5. Blend all the leftover grit of rice and quinoa, get it as mushy as you can.

6. Strain the muck (appetizing!) through your metal sieve and cheesecloth. Squeeze the heck out of it. I put a ceramic cereal bowl on top of the cheesecloth and press down like I have Arnold Schwarzenegger muscles. I'm not sure if you need to be this enthusiastic.

7. Add your sugar and another 2-2.5 cups water. Refrigerate.

I don't know about your family but we spend an atrocious amount of money on soy milk, I am sure it's the equivalent of a family who drinks cow's milk, even though soy rarely goes on sale; nor is it sold at Costco or in bulk. I am really excited at the possibility that we could effectively reduce our reliance on soy milk, the amount of waste it generates (the not being sold in bulk thing is a pain), and the associated health concerns. Before anyone freaks out about soy being healthy: I am fully aware that many of the issues surrounding soy milk comes from it being once of the most genetically modified vegetables on the planet. Scientists have been playing around with soy beans for a very long time. The soy milk our family uses comes from a company that has made a commitment to organic and sustainable practices and our tofu comes from a local farmer and producer (Acadiana Soy!) that has made the same commitment. That being said, soy still sometimes freaks me out and I'd rather err on the side of caution.

Just a note: This is very much gluten-free! Drink up, my gluten-intolerant/allergic friends!

Wednesday, April 28, 2010

Eggs and Creamed Spinach


For an easy-peasy brunch that is beautiful as well as delicious, look no further! I love making creamed spinach because it is dead easy but you can make any adjustments for what is in the fridge. I added tomatoes to this version because there were a couple kicking around that I needed to use and I thought it might calm the dandelion greens. A tip for the dandelion greens, they are quite tough and one of the more bitter greens so I definitely advise blanching them first (particularly if you are using its softer cousin, spinach) and use a 3 to 1 ratio of spinach to dandelion greens. This recipe works well with some serious improvisation, so have at it and have some fun!

Perfect! That yolk is like soft butter inside and the white is firm.

The Recipe

3-4 handfuls baby spinach
one handful blanched dandelion greens
one tomato, diced
2 tablespoons soft cheese (like chevre or my new obsession, quark)
half onion, diced
3 cloves garlic, minced
salt and pepper
white wine, orange juice
one egg per person

1. Heat olive oil in pan and add onion and garlic. Soften and let the flavours mingle and the juices release.

2. Add the spinach, a handful at the time. Alternate with your dandelion greens. You want enough to cover the bottom of the pan, about an inch thick and that is with the cooked spinach. Add the spinach slowly and wait for it to wilt down before adding more, otherwise you'll have spinach everywhere.

3. Mix in the cheese and allow to cream/melt into the mix.

4. Spread the cooked spinach across the bottom of the pan. Sprinkle the diced tomato on top and make shallow "pots" for the eggs. Gently place the egg whole in their little spots.

5. Add a dash of white wine or orange juice (I've even used the juice from pickled beets!) to act like a steam. Sprinkle the whole thing with salt and pepper. Cover and reduce the heat to low to allow the wine to cook off and the eggs to cook. I like the yolk soft and the whites completely cooked.

I have not timed it because I'm terrible at writing recipes for other people and I'm an instinctual cook but I watch for the egg whites to be cooked fully and a light sheen over the top of the egg yolk. This is the equivalent of soft boiled eggs. I'm daring to say it takes around 8 minutes but don't set that in stone!

Creamed spinach is particularly yummy served with quinoa for a light dinner or fruit and toast and brunch. You can even get daring and add hollandaise for decadence. For the adults I usually crack a little pepper on top of the yolk for a little bite.

Sunday, April 25, 2010

Creamy Rose and Mandarin Macarons


A sharp pang arcs through the muscle connecting my shoulder and neck. I have no idea if this will work, if the egg whites will go to waste and the pained muscle in my neck will be for nought. My body feels battered after the first attempt but I must try again. I am loathe to waste the egg whites aging in their compact container on my kitchen counter.

I am an impatient perfectionist. I have already tried this recipe and I barely whipped myself past the first step. Intense need drove me to embark on this potentially failed enterprise. I have yet to see one measly macaron in all of Halifax. Instead, for the last year I have sighed dramatically as I scrolled through countless pictures on the web and devised schemes to befriend and dazzle a Parisian into making or sending me just one package. I dutifully stored my spare egg whites in the freezer and longed for the day when I could make my very own macarons. I agonized over the flavours. Chocolate was enticing but also the most notoriously difficult. I was determined but not stupid (the whole impatient perfectionist thing can really bite me in the ass sometimes).


Why did I wait so long? Why did I torture myself with over a cookie (legendary, but still a cookie) that can be easily found in bakeries and pastry shops in Paris? Besides the obvious location problem I do not own an electric mixer. My reticence was completely unfounded. Thanks to the handy dandy internet I learned a couple of important things about whipping egg whites by hand:
1. Egg whites need air to whip. I tilted the bowl on its side to be able to properly toss the whites.
2. Whipping the egg whites properly literally takes only minutes. My first attempt found me uselessly whisking my eggs to no avail. If you leave the whisk pointed down and fail to incorporate sufficient air you'll get nowhere except heaps of frustration.

If you follow these recommendations it takes minutes.


I often play around with recipes but if David Lebovitz had to make 7 batches to perfect his recipe I wasn't going to mess around. I followed the recipe from seriouseats.com and didn't change a thing. Now that I'm more comfortable with the process I don't mind making adjustments. My strict adherence to the recipe did have one small change: I didn't age the whites as long as Robyn Lee suggests, I let the whites reach room temperature and only let them sit for a couple of hours. Overnight seemed a bit excessive.

The Macarons Recipe

From Robyn Lee at seriouseats.com: posted October 24, 2007.

Ingredients

225 grams icing sugar
125 grams ground almonds
110 grams egg whites (about 4), aged overnight at room temperature
30 grams granulated sugar
Pinch of salt

Procedure

1. On three pieces of parchment, use a pencil to draw 1-inch (2.5 cm) circles about 2 inches apart. Flip each sheet over and place each sheet on a baking sheet. [Note: You only have to draw circles on the parchment paper if you want absolutely even-sized macarons. If you're skilled with piping and don't mind eyeballing the amount of batter per cookie, skip this step.]

2. Push almond flour through a tamis or sieve, and sift icing sugar. Mix the almonds and icing sugar in a bowl and set aside. If the mixture is not dry, spread on a baking sheet, and heat in oven at the lowest setting until dry. (note: I used the blender. I don't have sieve. I apparently have the world's worst equipped kitchen.)

3. In a large clean, dry bowl whip egg whites with salt on medium speed until foamy. Increase the speed to high and gradually add granulated sugar. Continue to whip to stiff peaks—the whites should be firm and shiny.

4. With a flexible spatula, gently fold in icing sugar mixture into egg whites until completely incorporated. The mixture should be shiny and 'flow like magma.' When small peaks dissolve to a flat surface, stop mixing.

4. Fit a piping bag with a 3/8-inch (1 cm) round tip. Pipe the batter onto the baking sheets, in the previously drawn circles. Tap the underside of the baking sheet to remove air bubbles. Let dry at room temperature for 1 or 2 hours to allow skins to form.

5. Bake, in a 160C/325F oven for 10 to 11 minutes. Use a wooden spoon to keep the oven door slightly ajar, and rotate the baking sheet after 5 minutes for even baking.

6. Remove macarons from oven and transfer parchment to a cooling rack. When cool, slide a metal offset spatula or pairing knife underneath the macaron to remove from parchment.

7. Pair macarons of similar size, and pipe about 1/2 tsp of the filling onto one of the macarons. Sandwich macarons, and refrigerate to allow flavors to blend together. Bring back to room temperature before serving.


The Icing: Creamy Mandarin and Rose


one tablespoon of quark*

icing sugar

juice and zest of one mandarin

teaspoon rose water

1. Cream quark and the juice and zest. Add icing sugar and mix until no longer runny but not too stiff. Add the rosewater at the end.

I'm so sorry ... I never measure the icing sugar, I just add until I get to a decent texture. You want to be able to spread it and not have it run off the side. That means it should run off the spoon or crack when you pull the spoon through it.


*Quark is a soft, unaged cheese that is not as creamy as cream cheese nor as dry as chevre. It's kind of in the middle. It has an almost sweet and gentle flavour and it is my new favourite cheese.


For a perfect little saltiness I sprinkled a light dusting of sea salt on the icing before sandwiching the macarons. Yum.


A few things:

1. Macarons are amazing and I love them. They are perfect for the gluten-intolerant folks like myself.

2. They are not that hard to make. You should do it now!

3. If you peer closely you'll see that only about half of my macarons have feet. I don't care because it means I have to keep experimenting until their perfect. Oh well, I can handle that.